
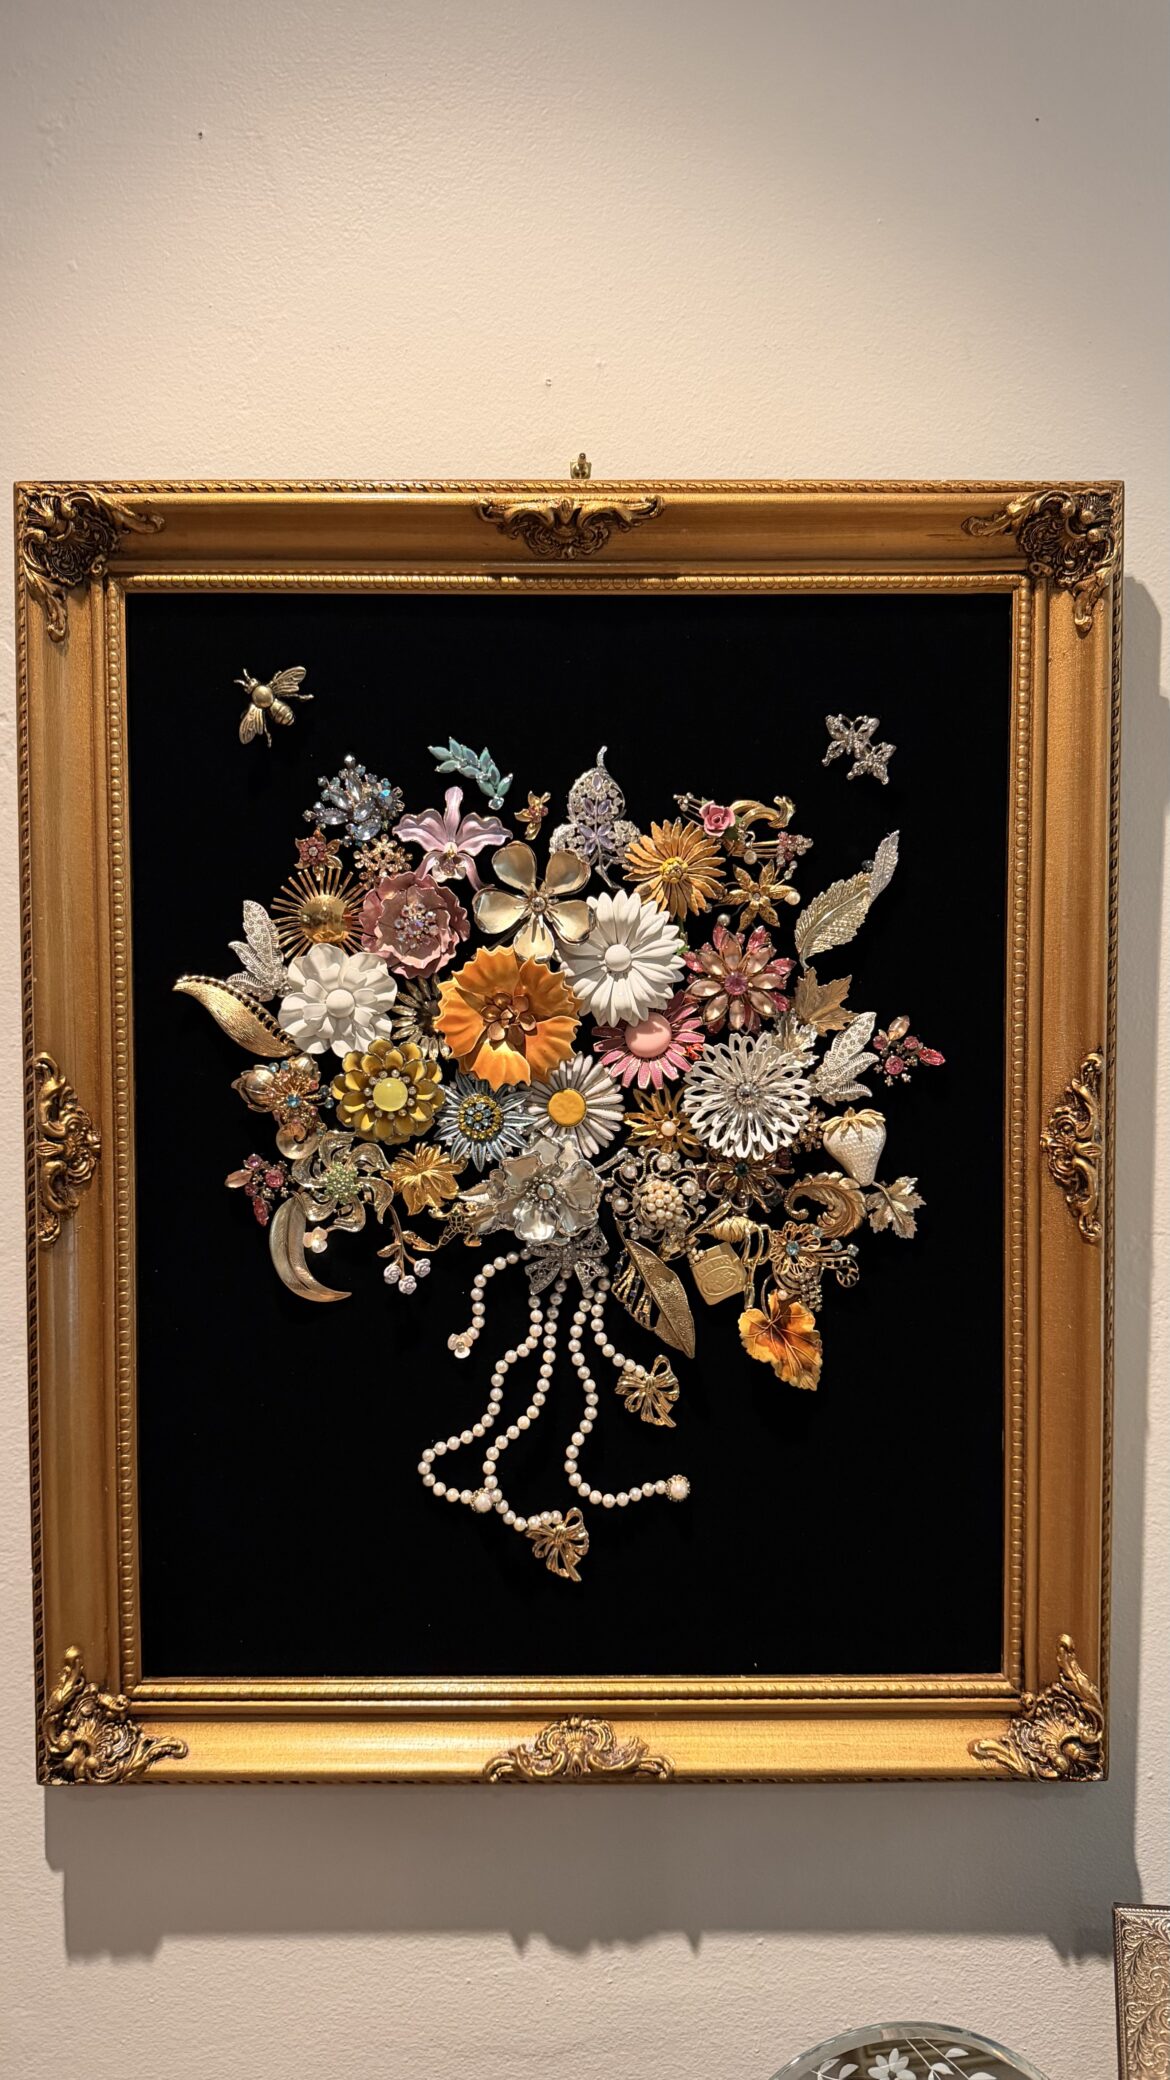
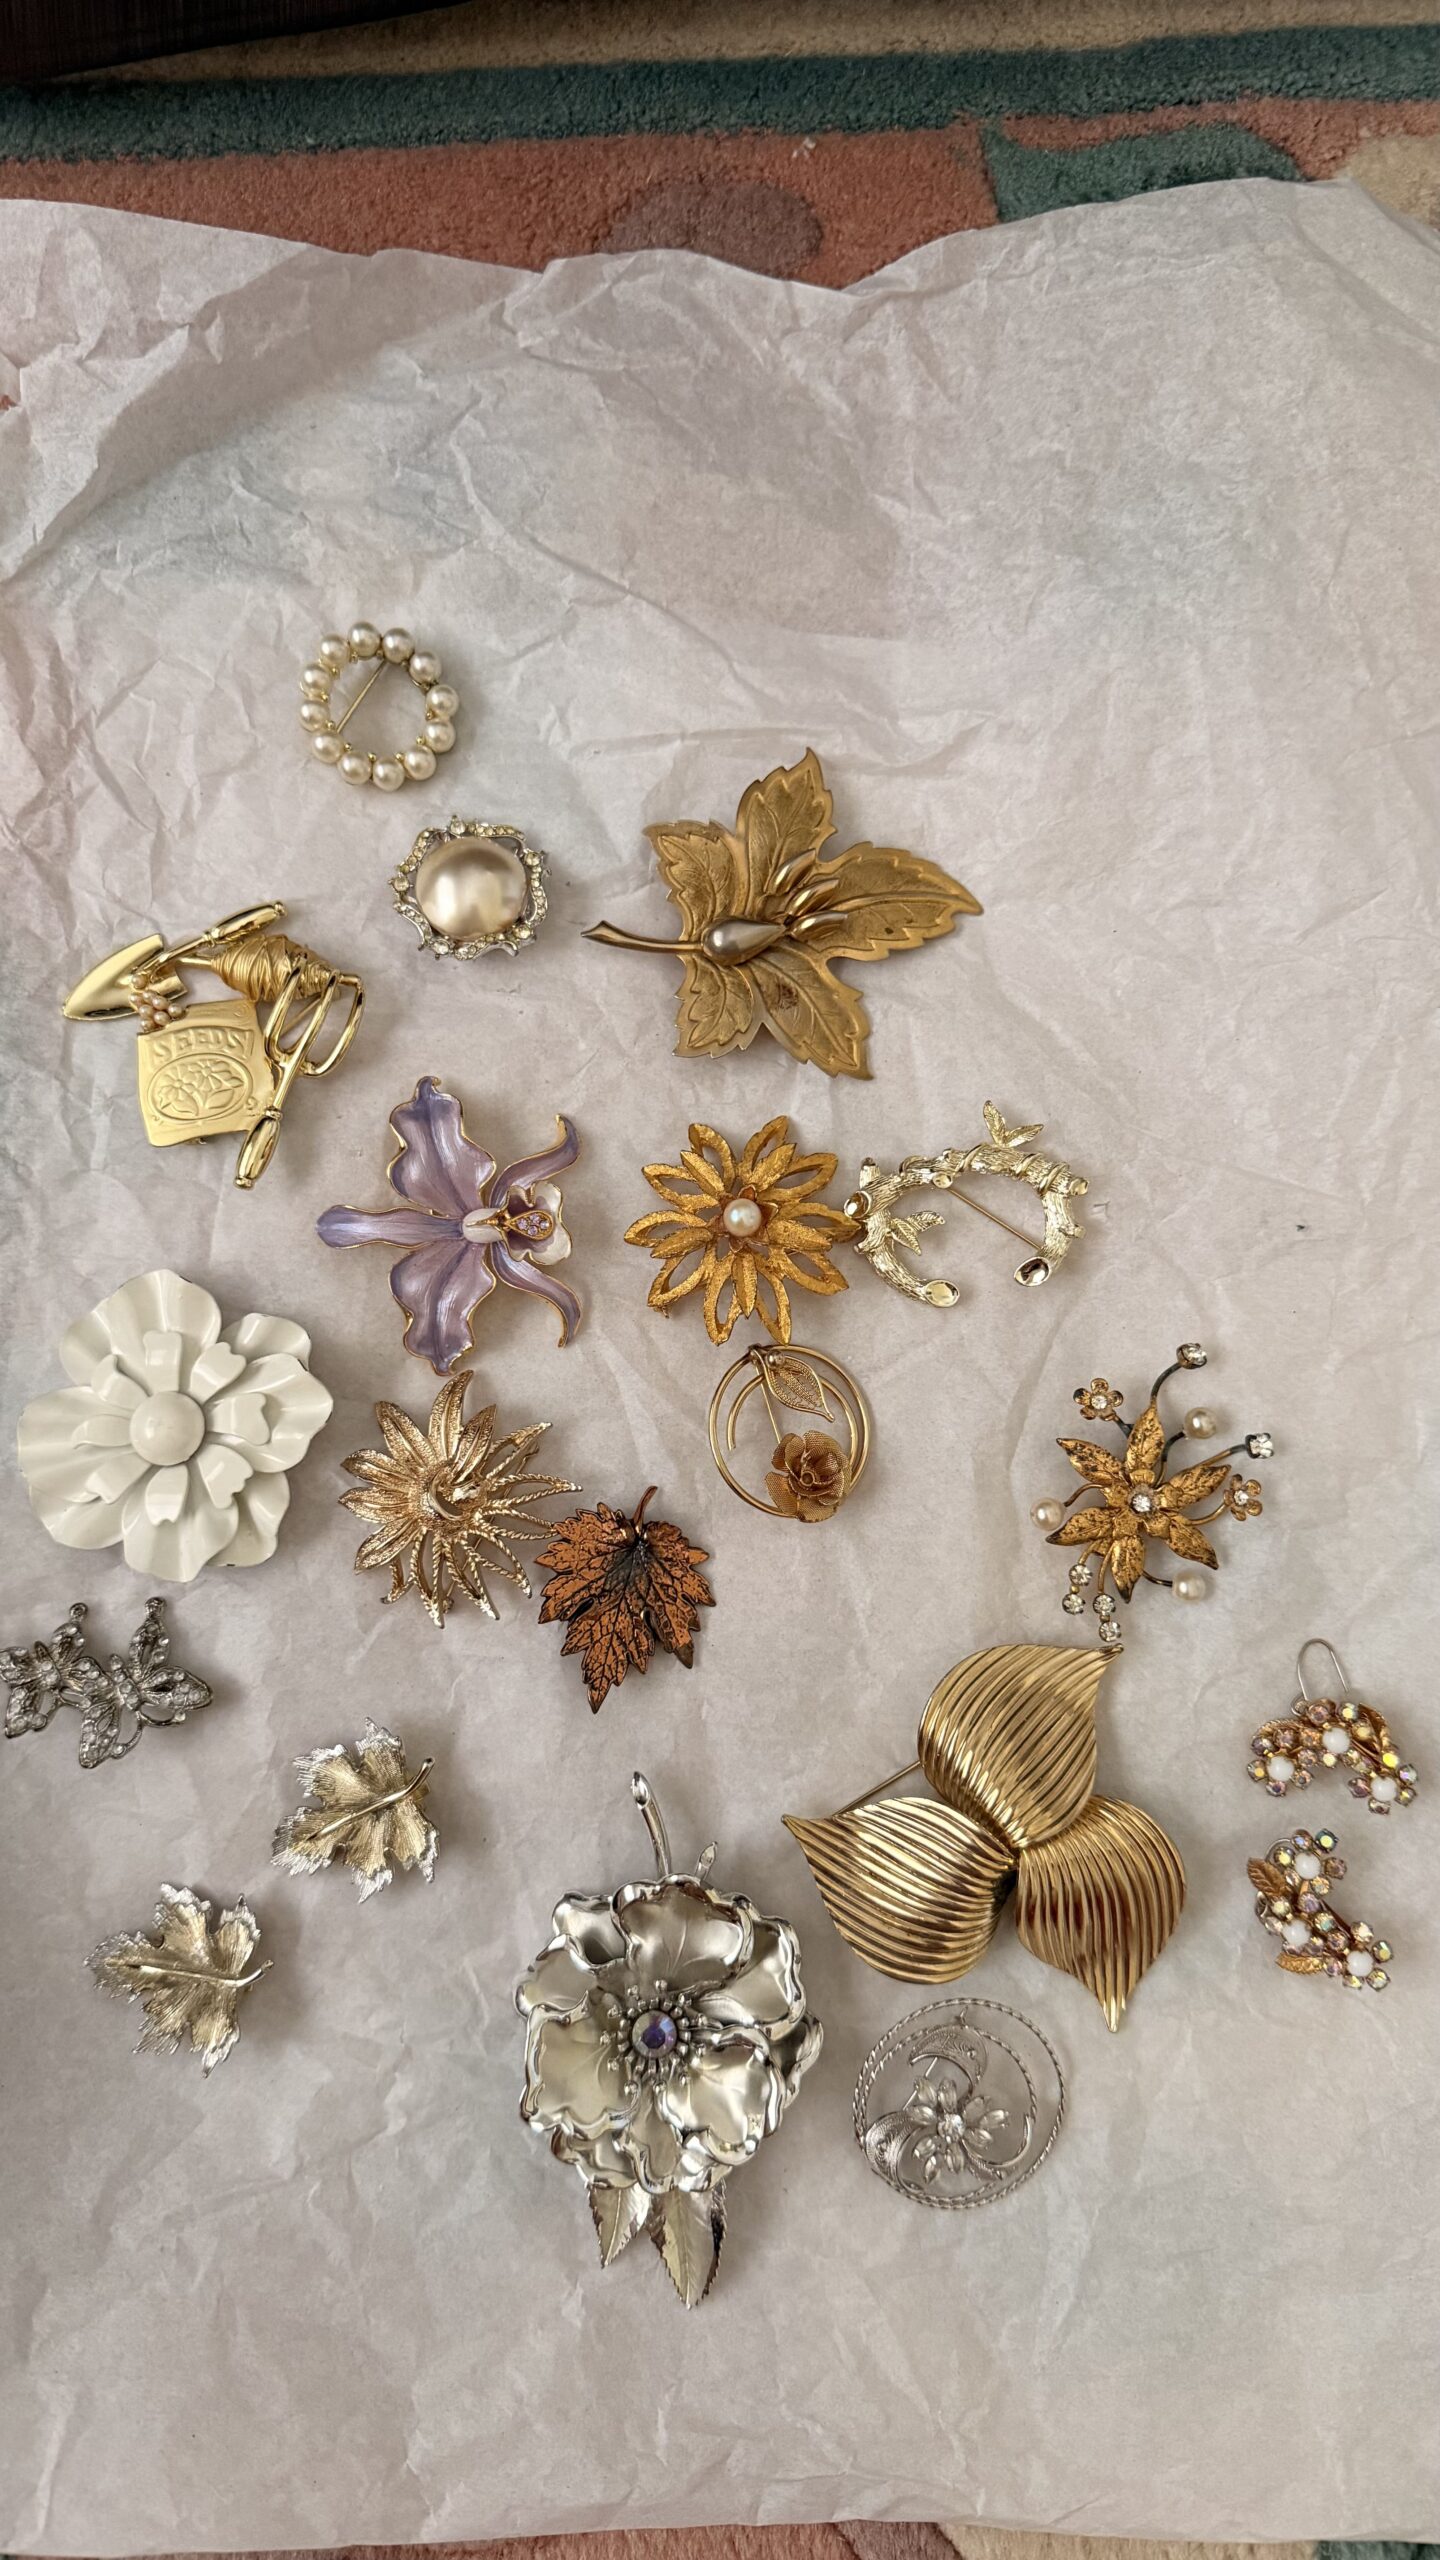
What would you do with a collection of vintage brooches? I asked myself that after sorting through some of my mom’s brooches. Some of them were actually mine over the years I threw in a box. It seemed like such a waste to donate them knowing how many we had and how beautiful they were.
I laid them all out and I thought – Why not create some art with it – like those Christmas Tree Brooches? They all had a theme to them anyway, they were flowers or a frog, butterfly, even a cute seed and garden trowel brooch! There was naturally a theme and perfect for me being a gardener.
I brought them all back home to create something that would be on display all the time – not just for Christmas (though if I had a Christmas one I’d probably leave it up year round anyway!)
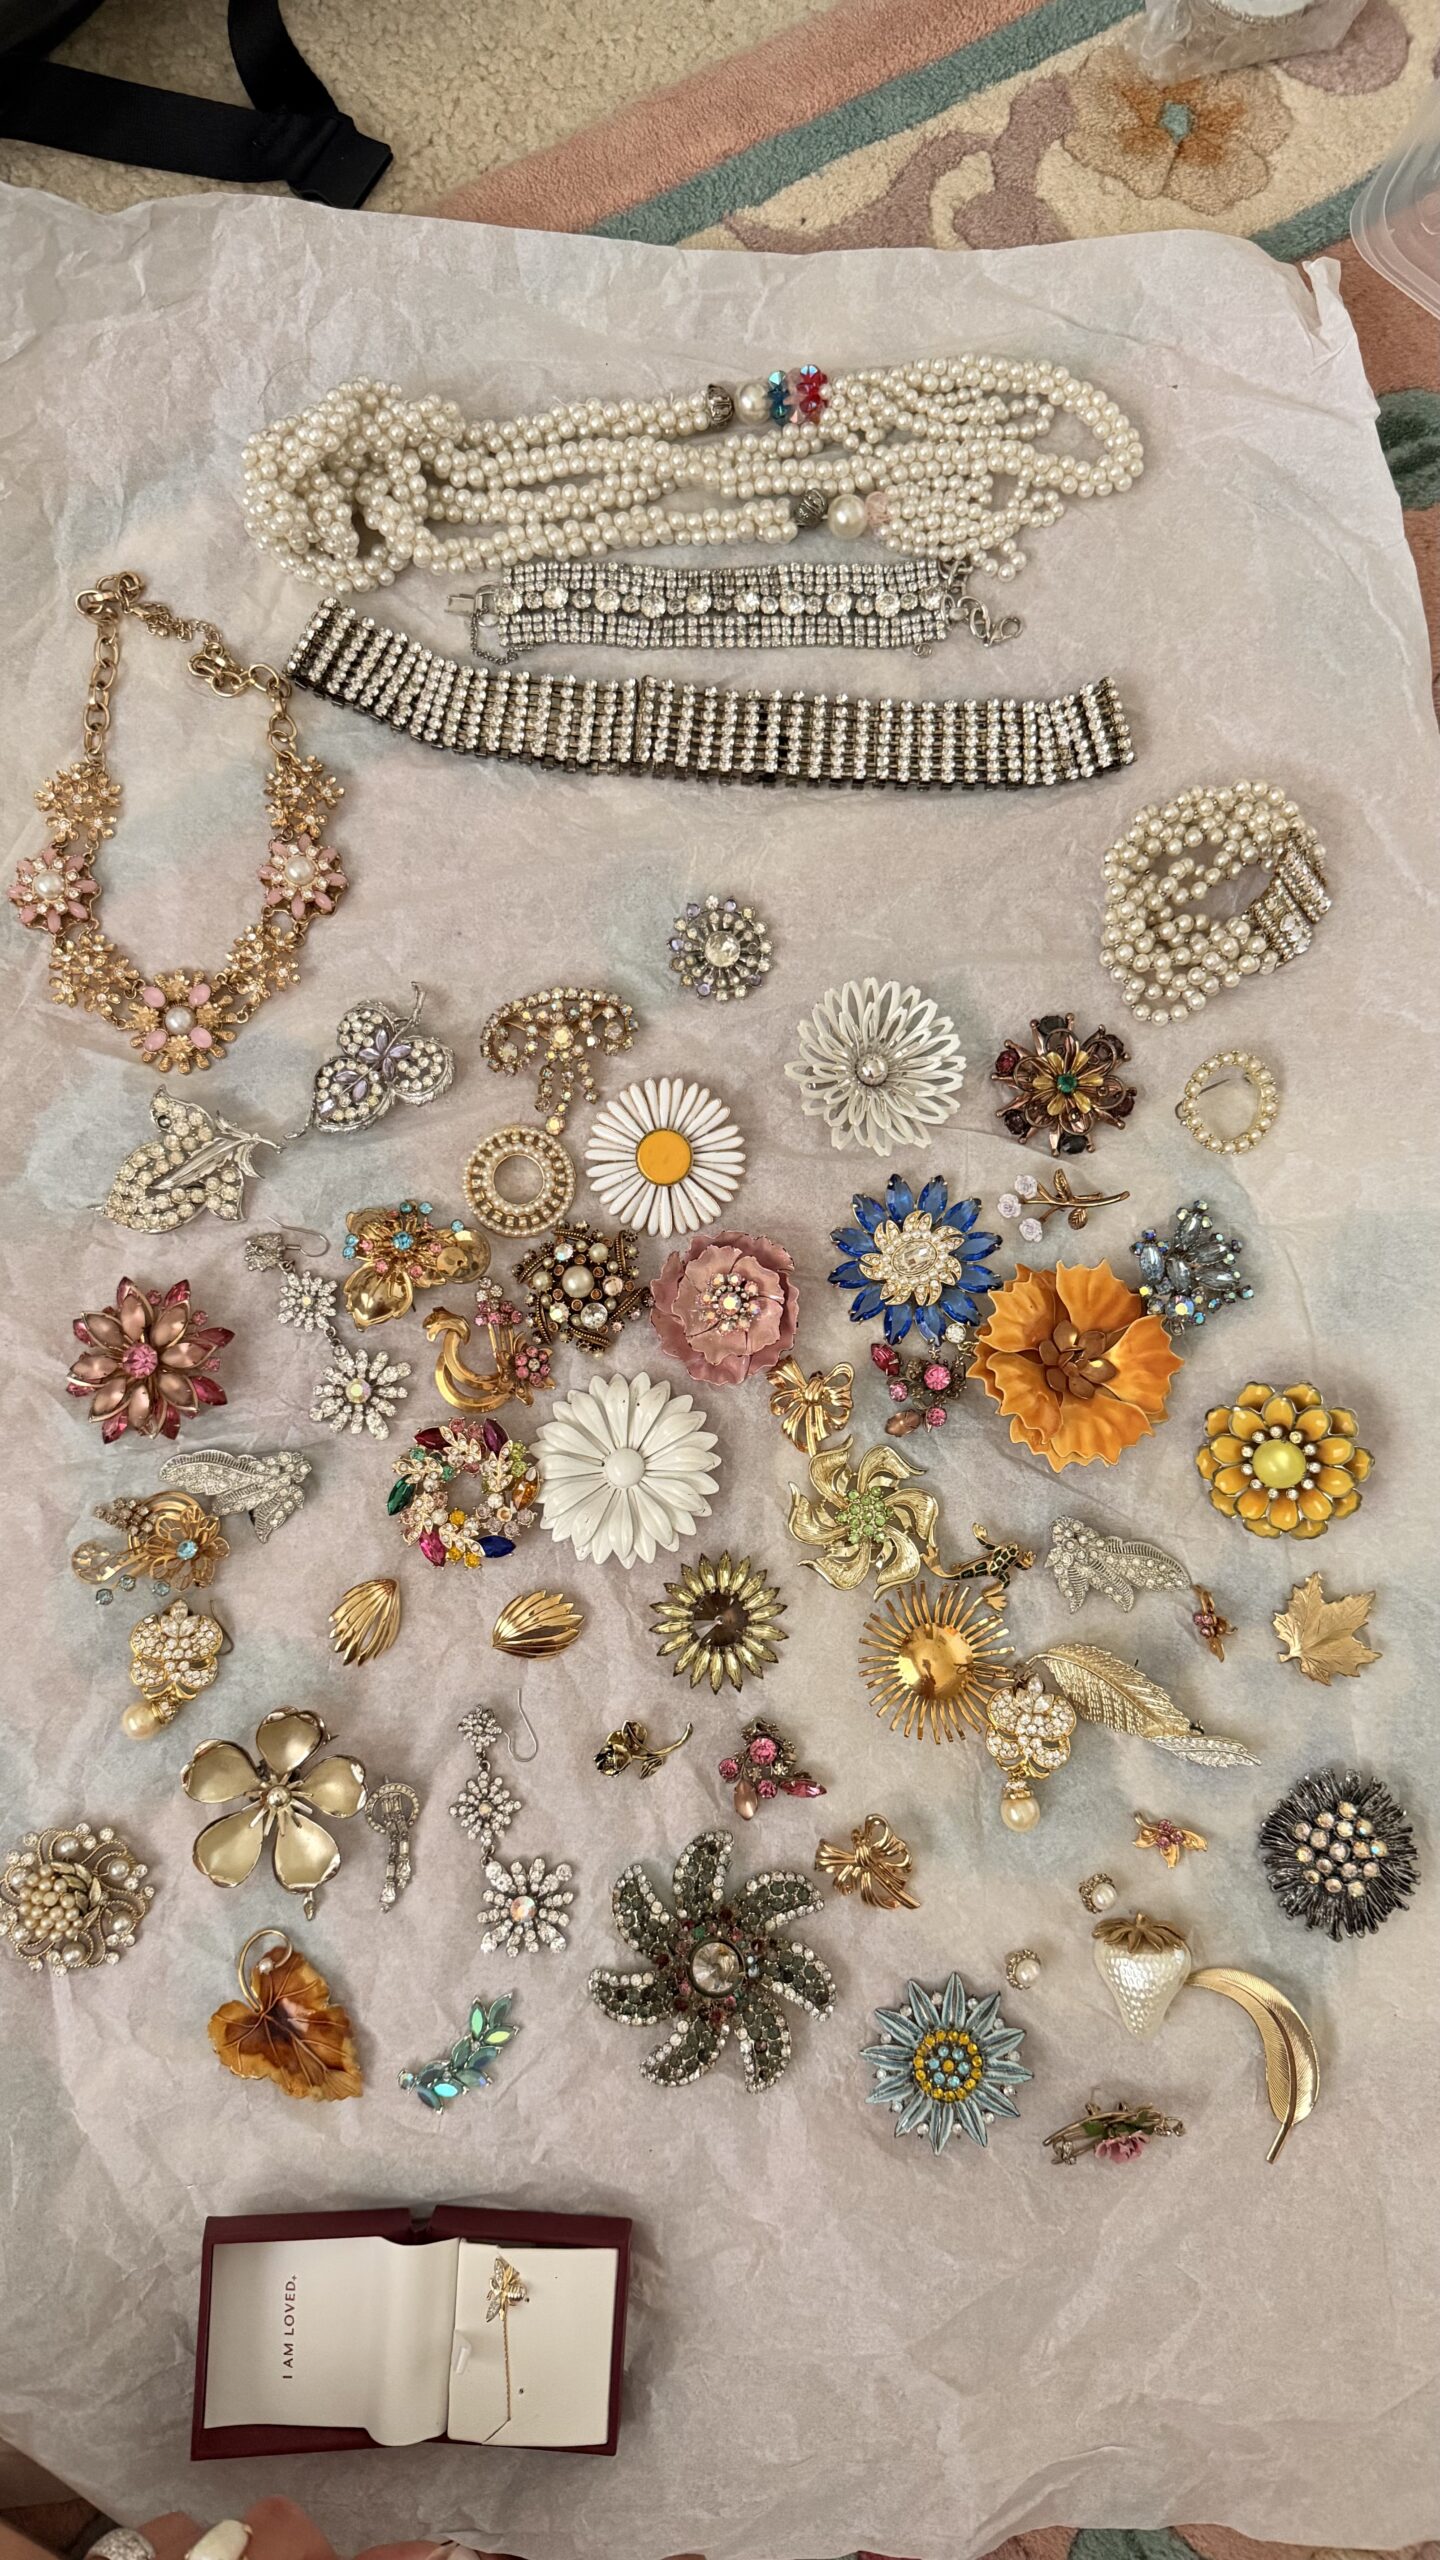
A Beautiful Way to Display Old Jewelry
How to Make Vintage Brooch Bouquet Wall Art
You might have some brooches from your grandma, mom, or just a few passed down or gifted to you. I thought turning them into a framed brooch bouquet is a great way to preserve history while creating one-of-a-kind wall art – you pick the shape! You could do a wreath, a heart, you can even ask Chat GPT for ideas!
This DIY brooch project combines vintage charm with timeless home décor, making it ideal for Grandmillennials – or anyone really who appreciates vintage and unique art. I thought about pinning them on my LL Bean Boat and Tote but with how many I own I thought I probably could create something so unique with them all!
Supplies Needed
Before you begin, gather your materials.
Large Frame
Choose an ornate vintage frame or a traditional gold frame. A frame between 16×20 and 18×24 inches works well for creating a statement piece. The larger the better. Would you believe it if I told you this frame was my former high school senior photo frame?
Black Velvet
Velvet fabric with a back adhesive creates a rich backdrop that allows the jewelry to sparkle. Black offers the most dramatic contrast, but you could pick any colors. I almost did an ivory color but I really think the black makes it pop, plus I already had it on hand.
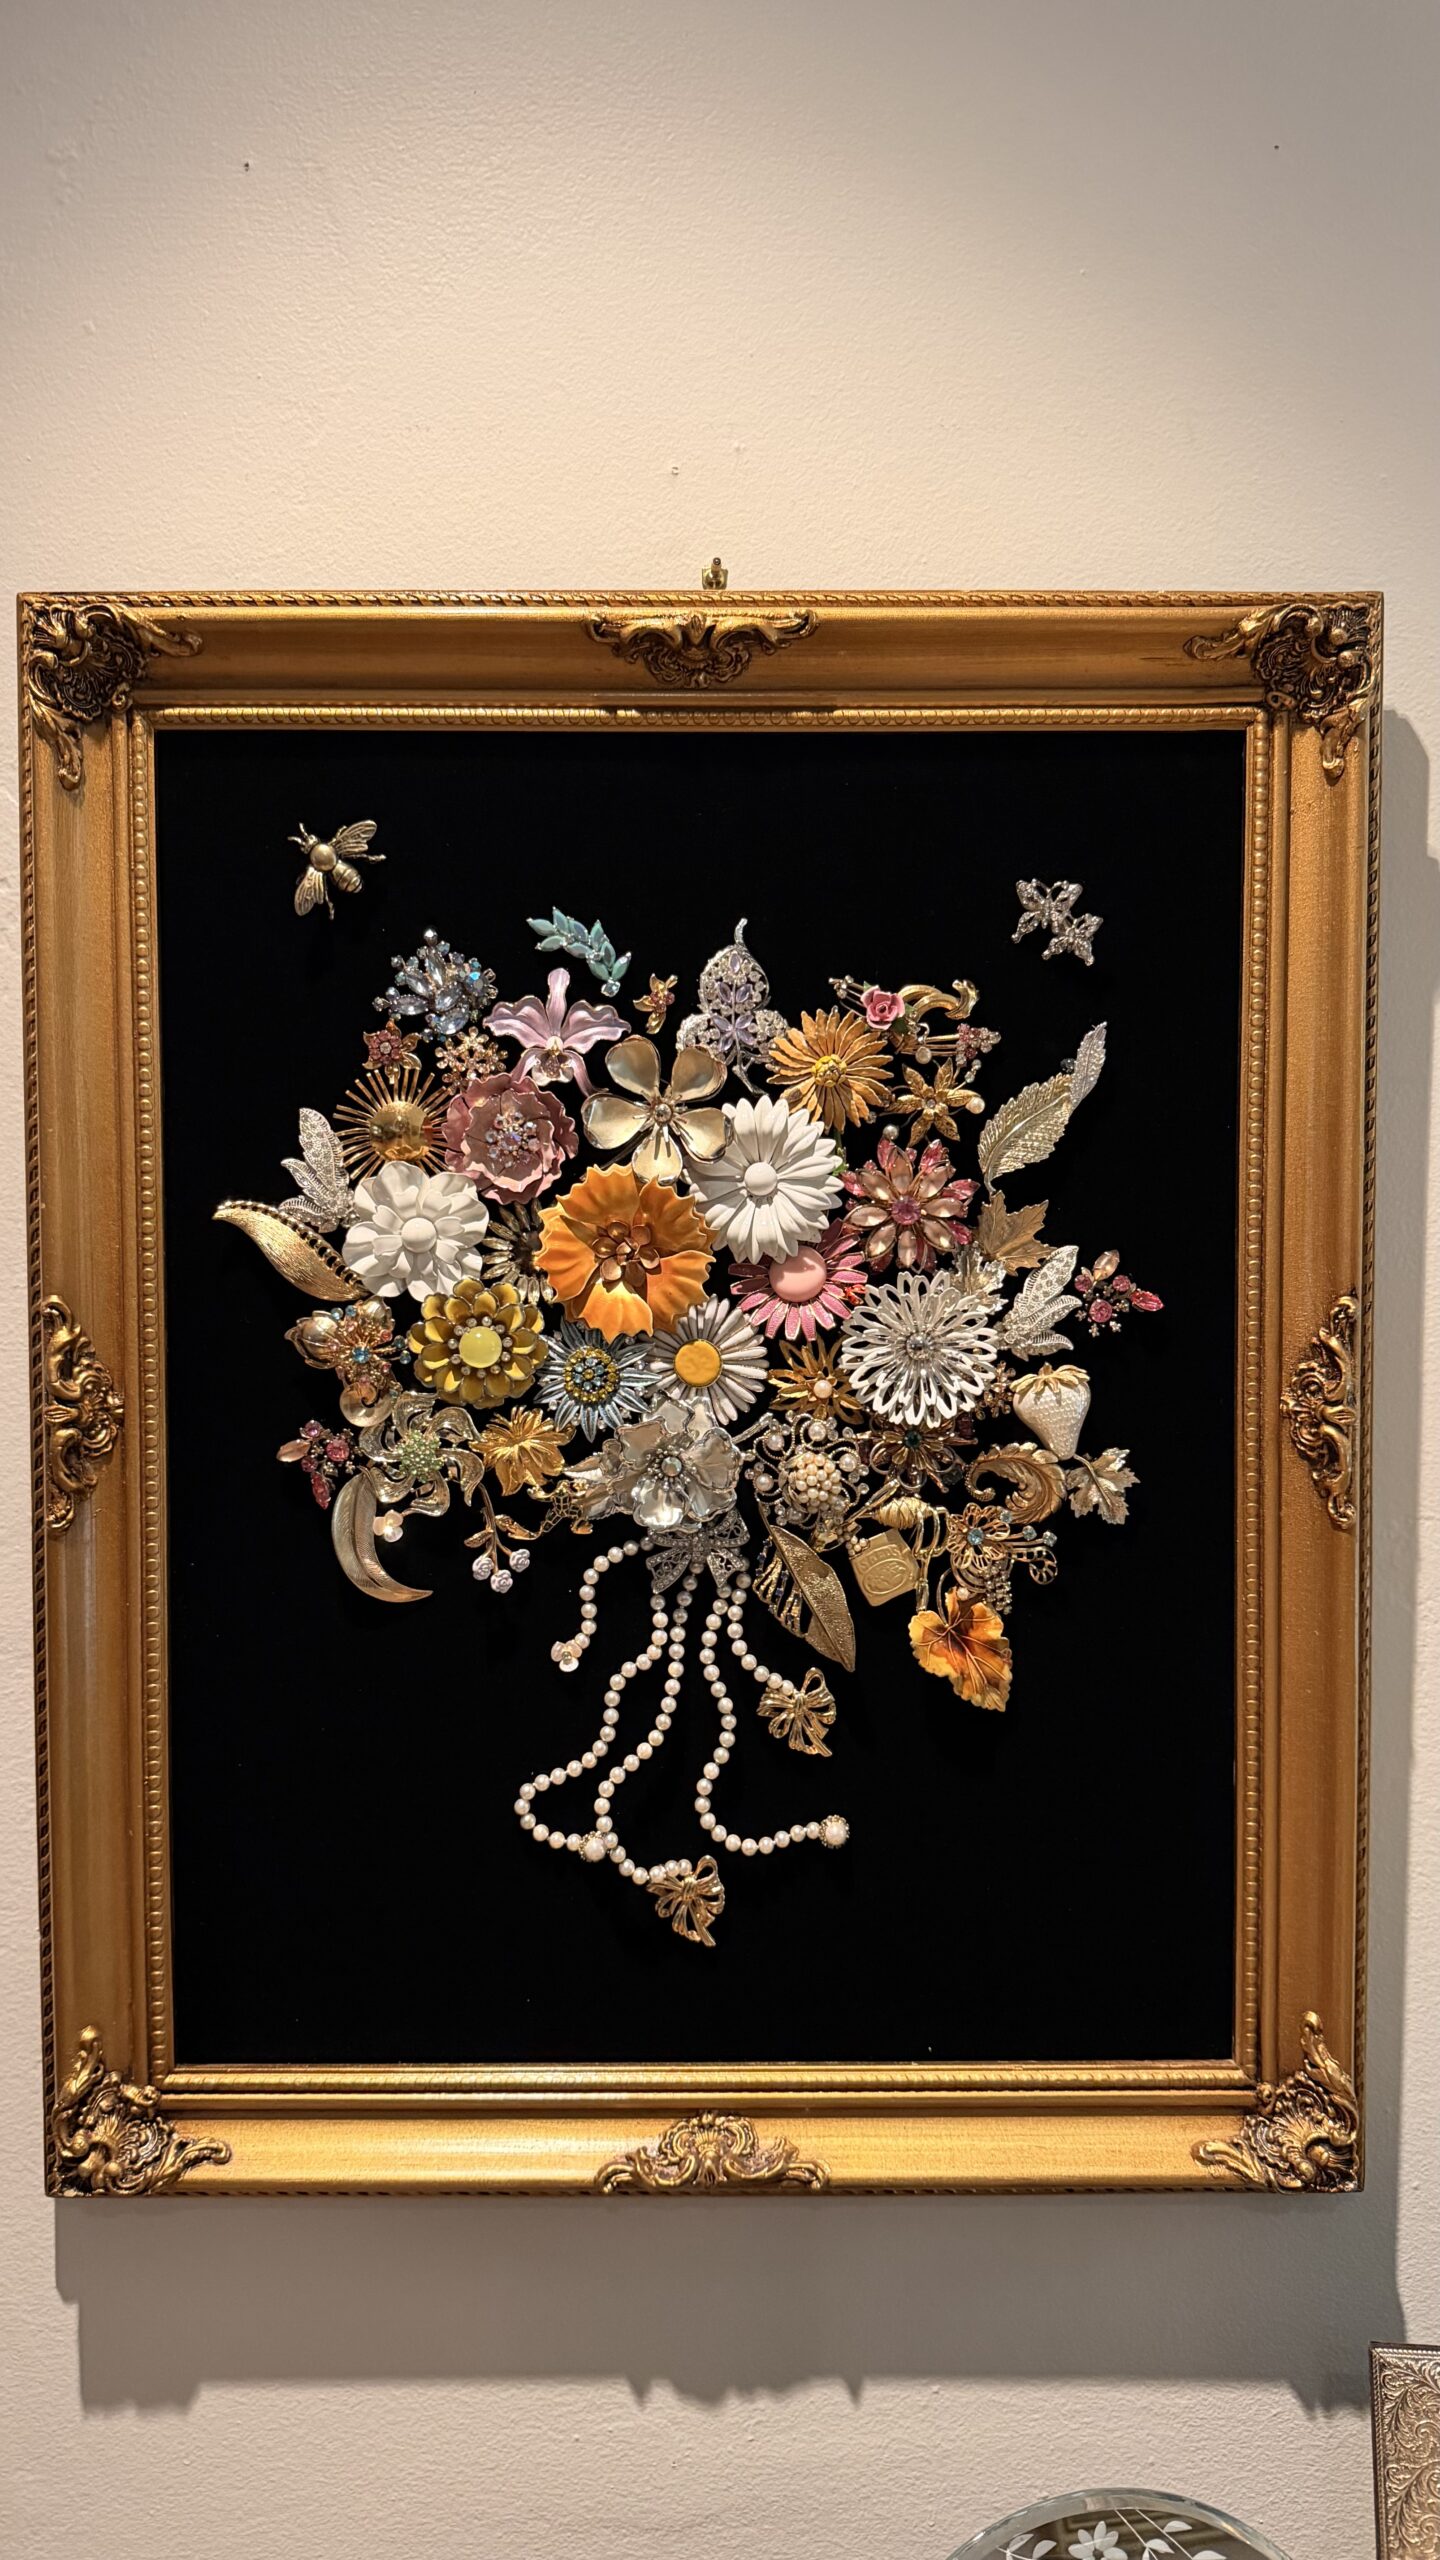
Foam Board, Cork board, or Acid-Free Mount Board
This provides a sturdy backing underneath the velvet. But between the board I also used this cork board so I could pin to it.
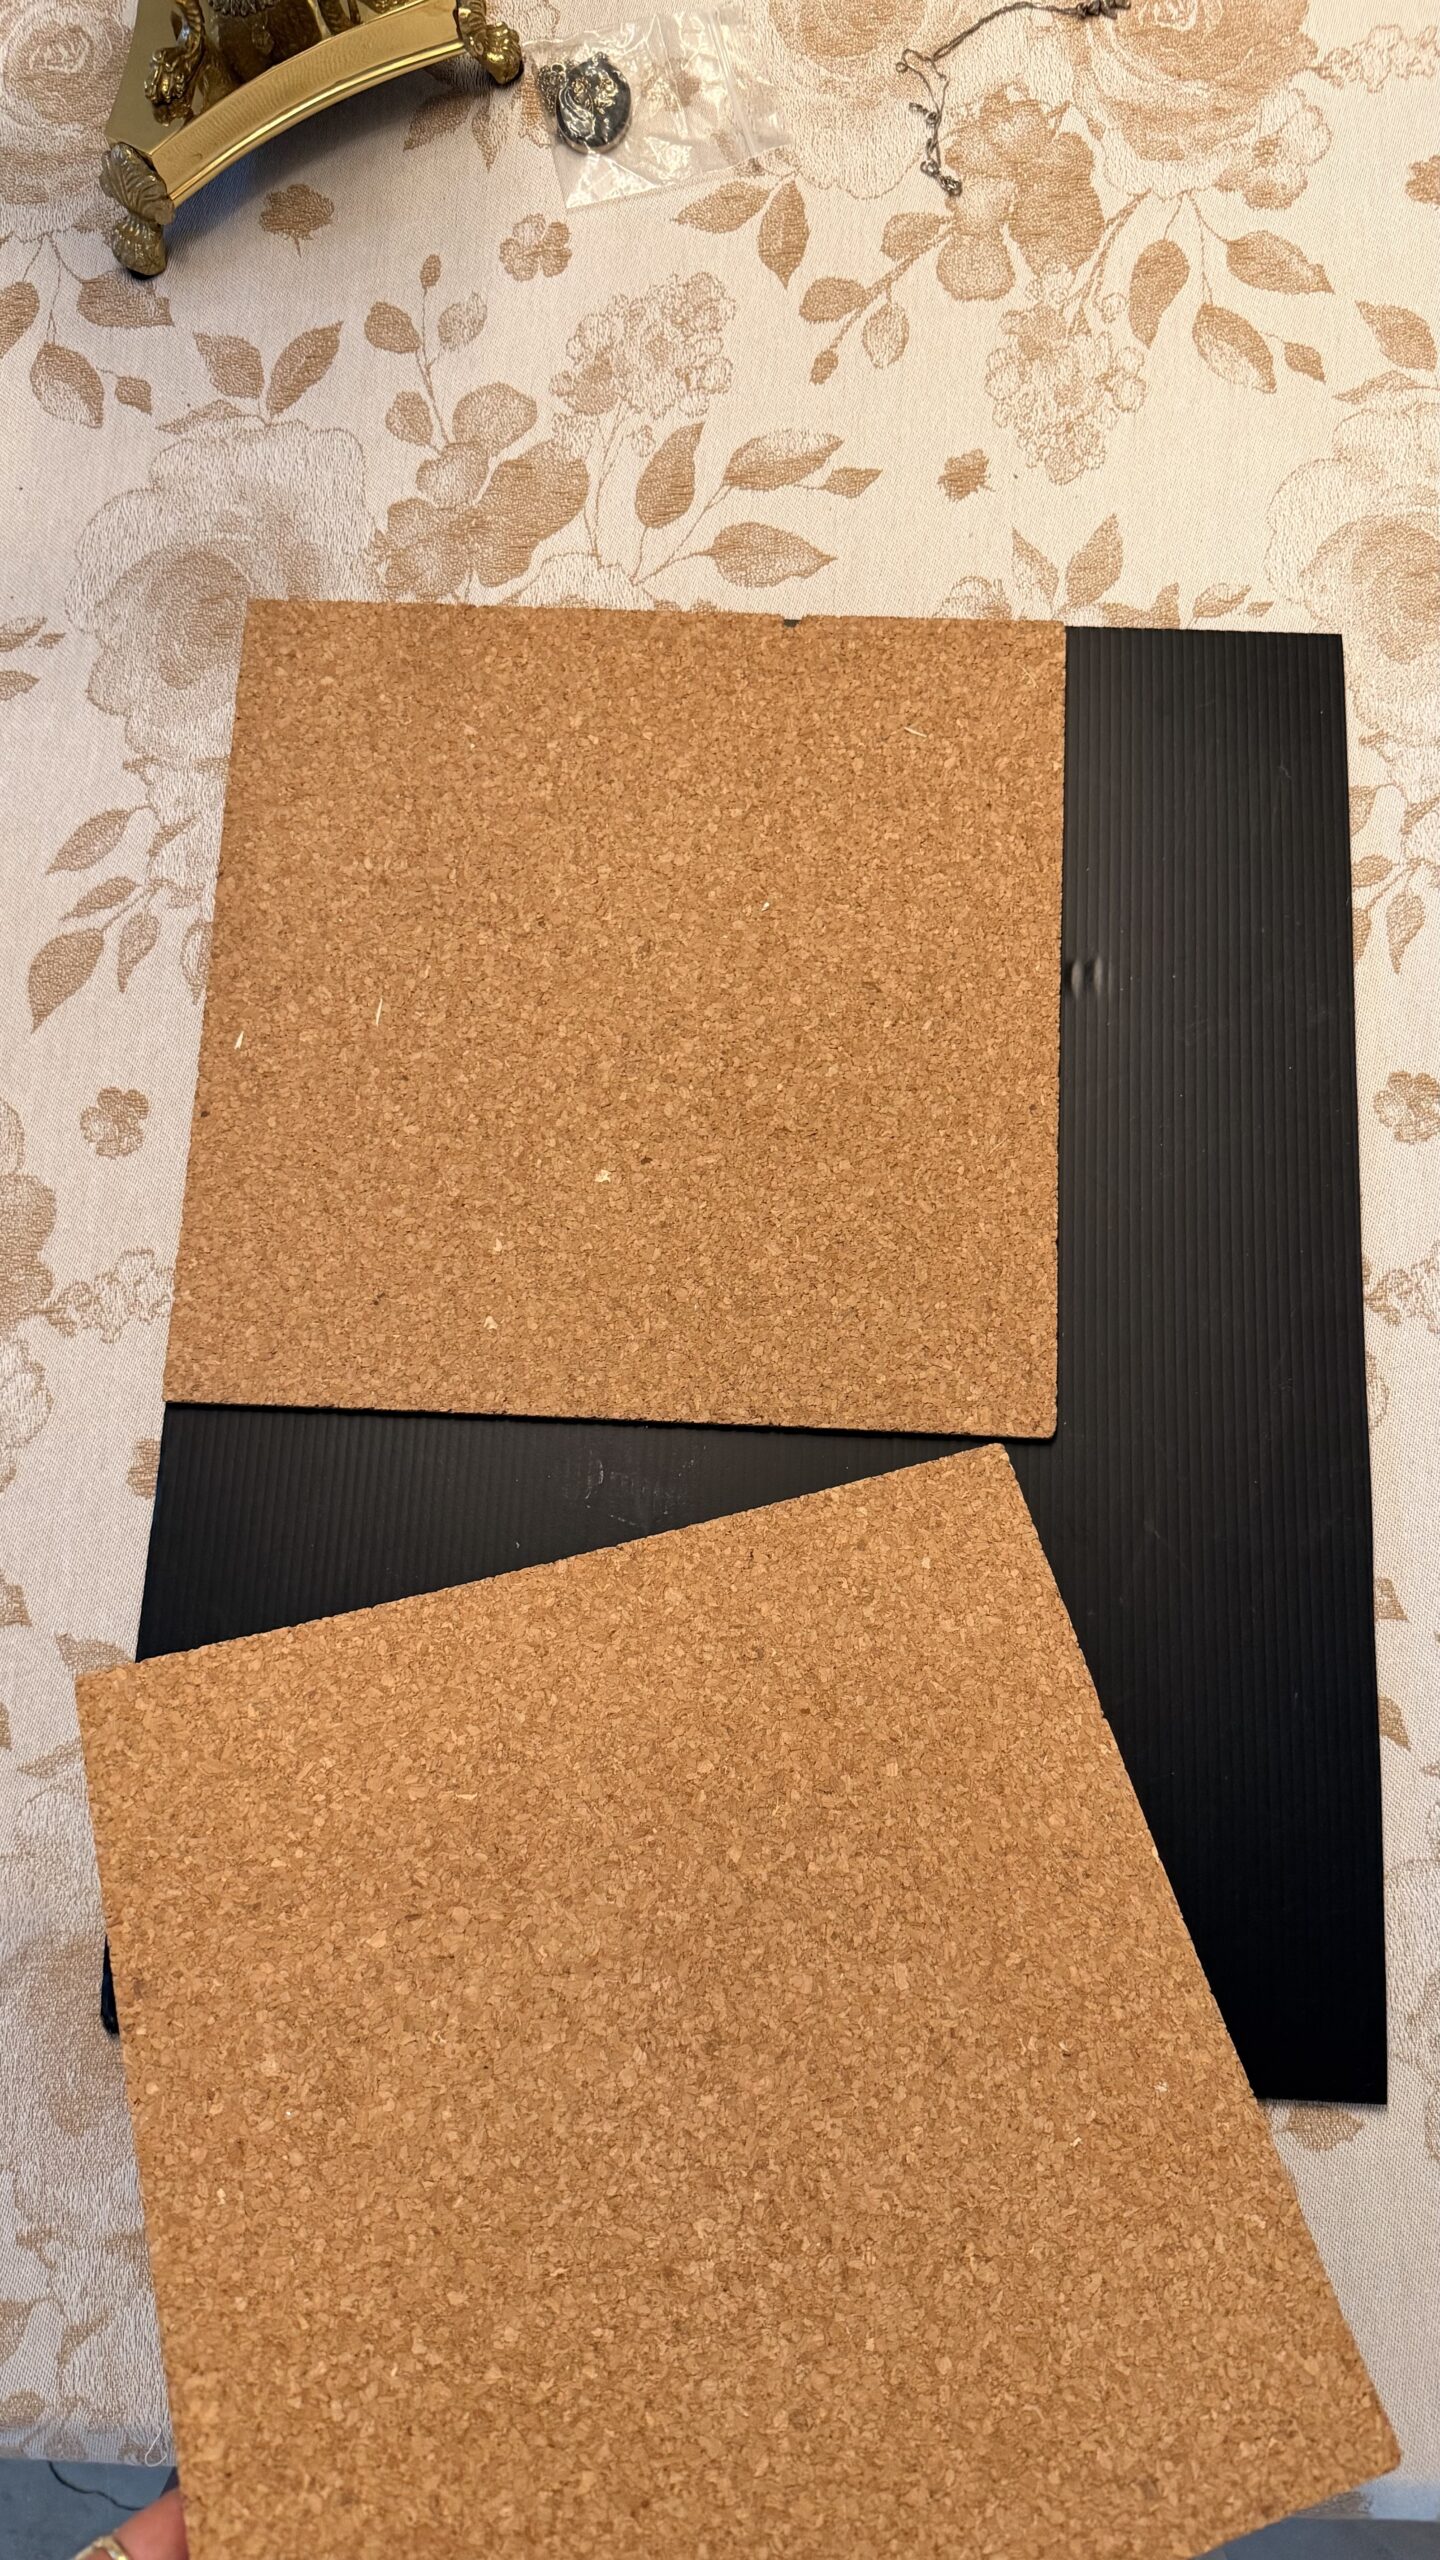
Vintage Brooches
The stars of the project! A mix of flowers, leaves, butterflies, bees, pearls, and rhinestone pieces creates the most natural bouquet. If you plan to do a Christmas one, you could consider Christmas themed brooches, but they don’t all have to be Christmas related. I decided that I would use as much flower related brooches for this particular project.
Pins or Archival Adhesive
Depending on the type of jewelry, you’ll either pin pieces through the backing – like stab it through the velvet sideways, or secure them with a hot glue gun (I like that because you can remove it one day off the jewelry if you want).
Optional Embellishments I also used:
- Vintage faux-pearl necklaces
- Bees
- Butterflies
- Ribbon
- Botanical charms
Where to Find Vintage Brooches
One of the most enjoyable parts of this project is collecting unique pieces over time, you can source them on eBay or Poshmark if you want to buy a lot. You could also find them at estate sales, antique and thrift stores.The thing is, the cost can add up fast, so might be best buying a lot of them on eBay. Search for “vintage brooch lot” to find multiple brooches they tend to have themes too so you can say “floral brooch lot”.
Ask parents, grandparents, friends, or relatives if they have jewelry tucked away in a drawer they don’t want any longer. Creating artwork from inherited pieces would be so special!
How to Arrange the Bouquet
OK this was interesting. I couldn’t figure out where to start.
A few tips:
- Start with the largest flowers in the center.
- Build outward using medium and smaller flowers.
- Add leaves at the edges
- Place butterflies and bees slightly away from the bouquet.
- Mix finishes like pearls, rhinestones, enamel, and gold for added depth.
- Leave a little negative space so each piece can shine.
Before attaching anything permanently, photograph several different arrangements. I used Chat GPT to upload the progress to get feedback or tell it to rearrange it better for me.
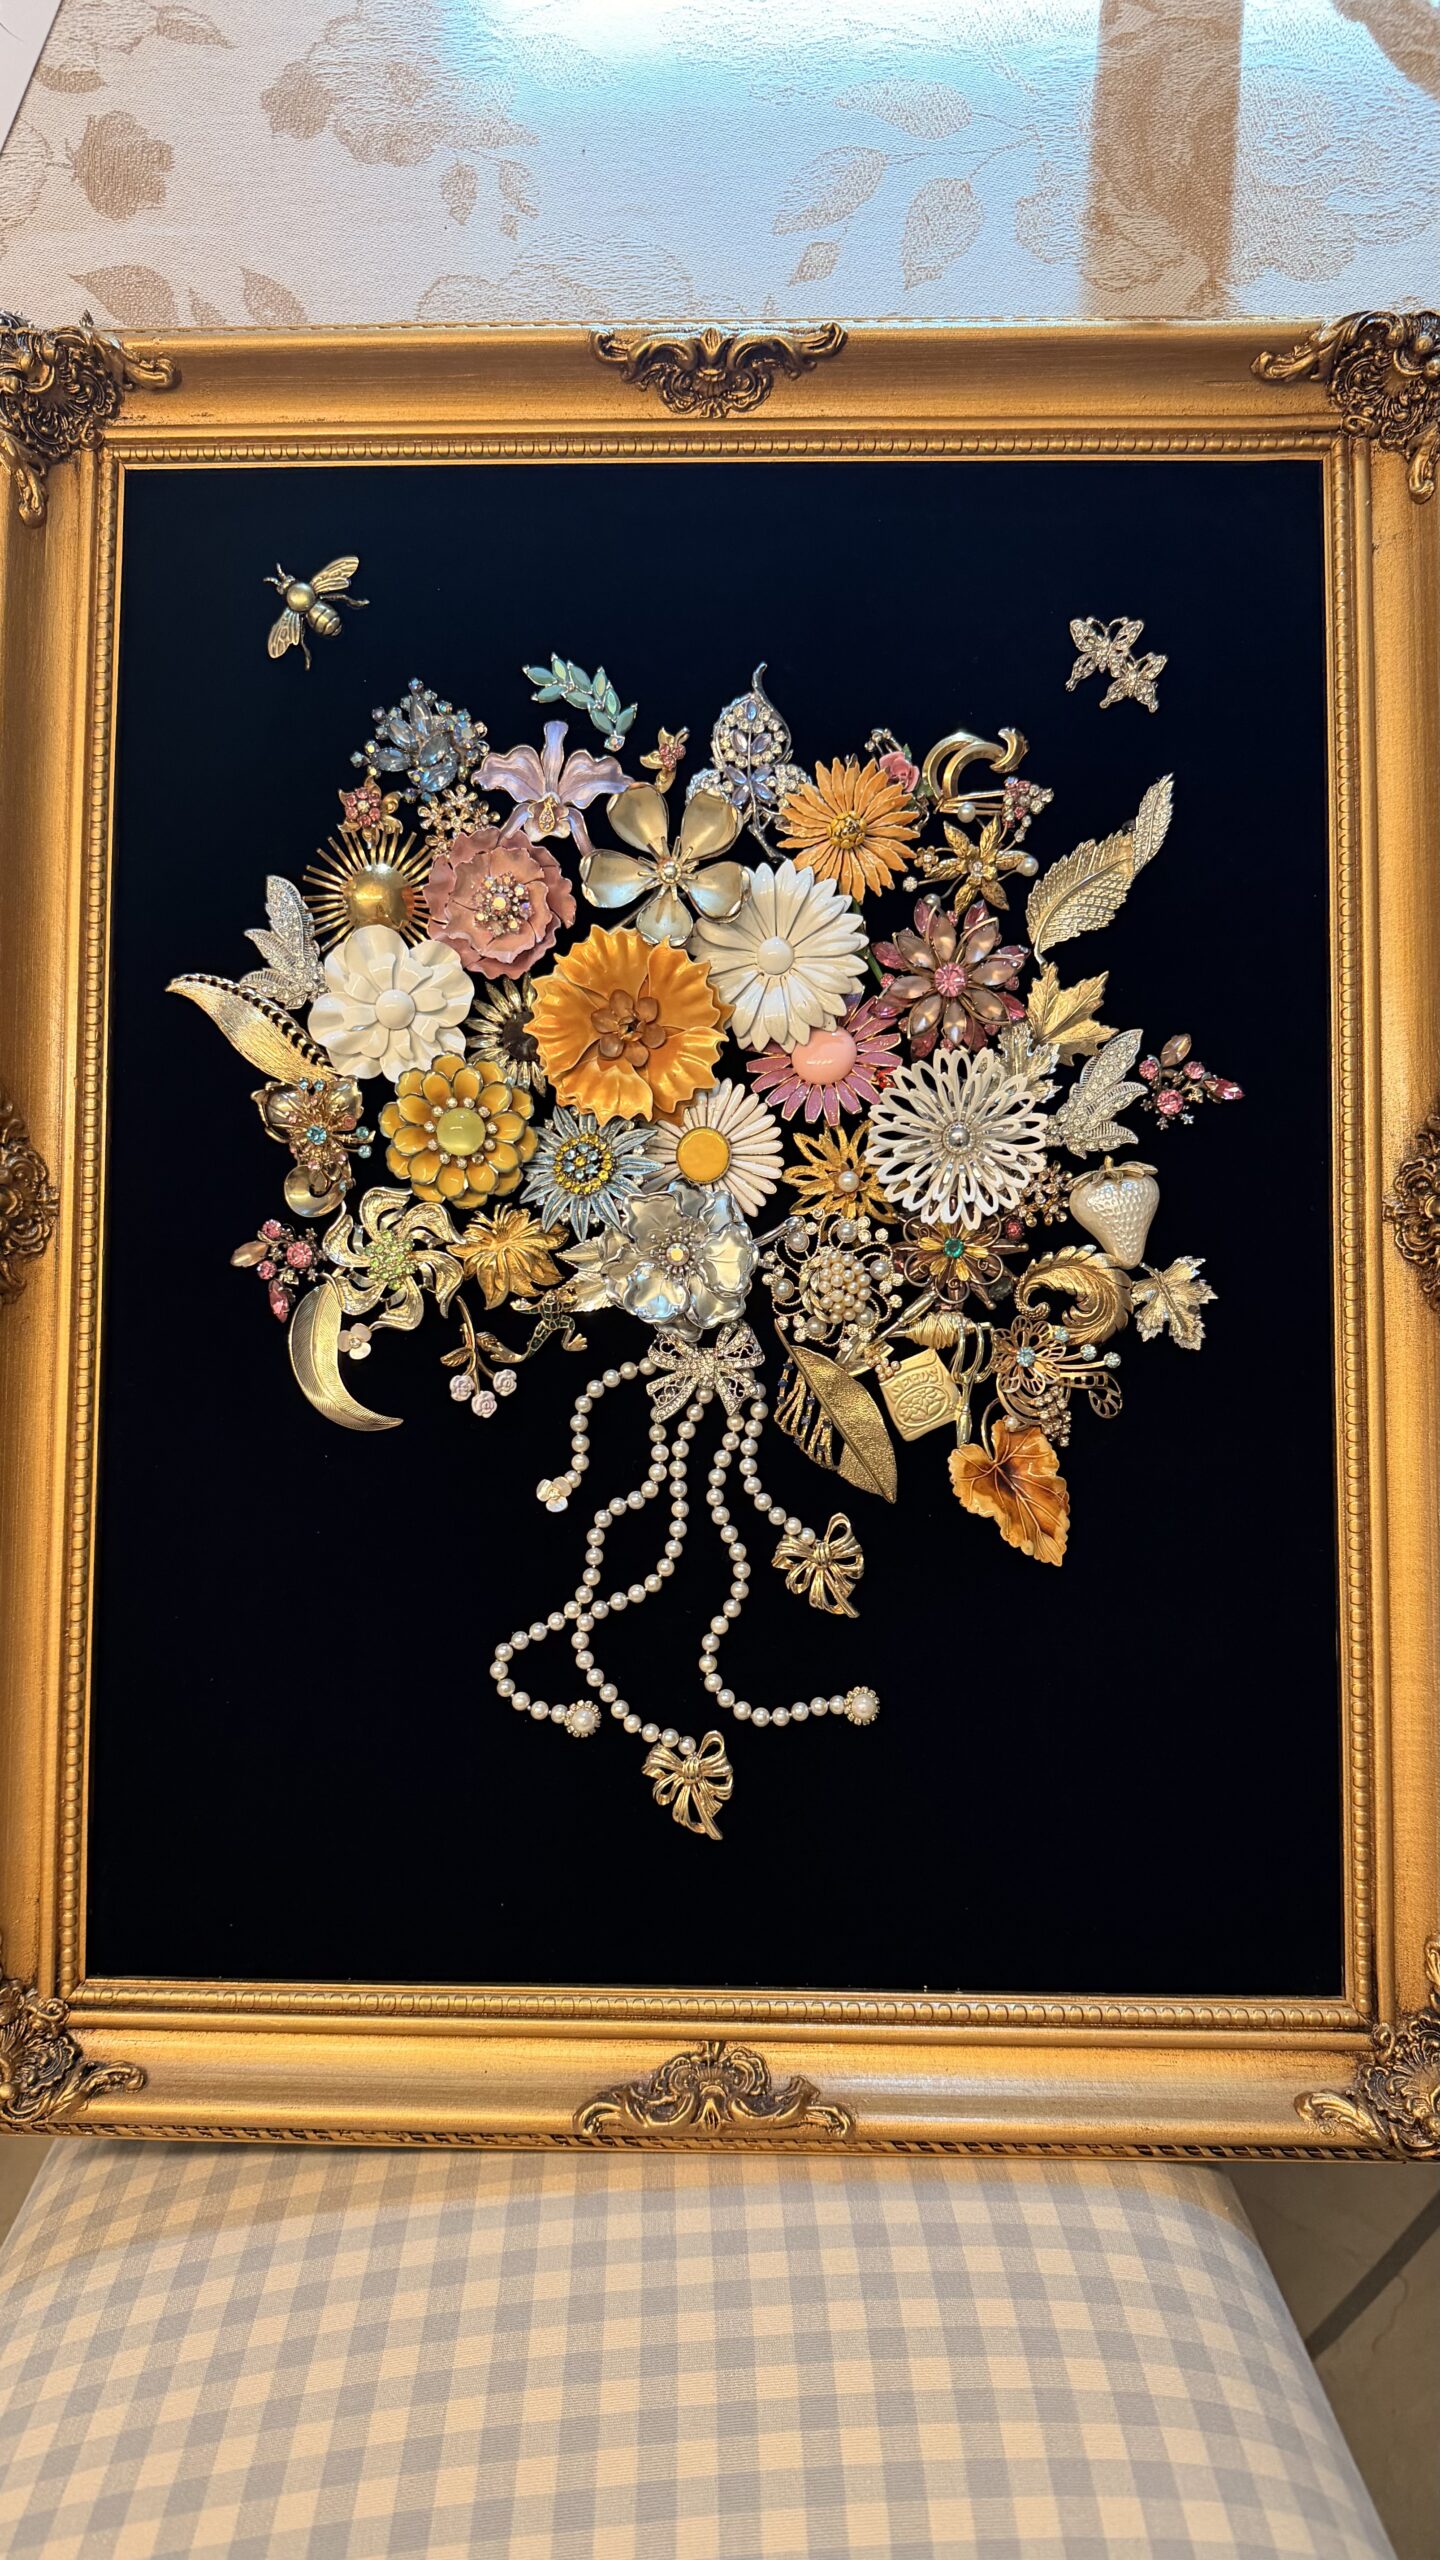
Snap a photo too. I don’t know why, but I think viewing your design on your phone often makes it easier to spot areas that feel too crowded or unbalanced. Also take breaks because sometimes you stare too much at the project you need a break to refresh your view!
How to Secure the Brooches to Velvet
There are two popular methods for attaching vintage brooches.
Option 1: Use the Brooch Pins (Recommended)
If your brooches still have working clasps, simply pin them through the velvet and foam board backing. I suggest angling it down though because once you hang it, it will flop so make sure it’s attached with the pin going down (if you can).
This method:
- Doesn’t permanently alter the jewelry
- Allows pieces to be rearranged later
- Provides a secure hold
Option 2: Use Archival Adhesive
For pieces without functioning pins, I used a hot glue gun.
Styling Ideas for Traditional and Grandmillennial Homes
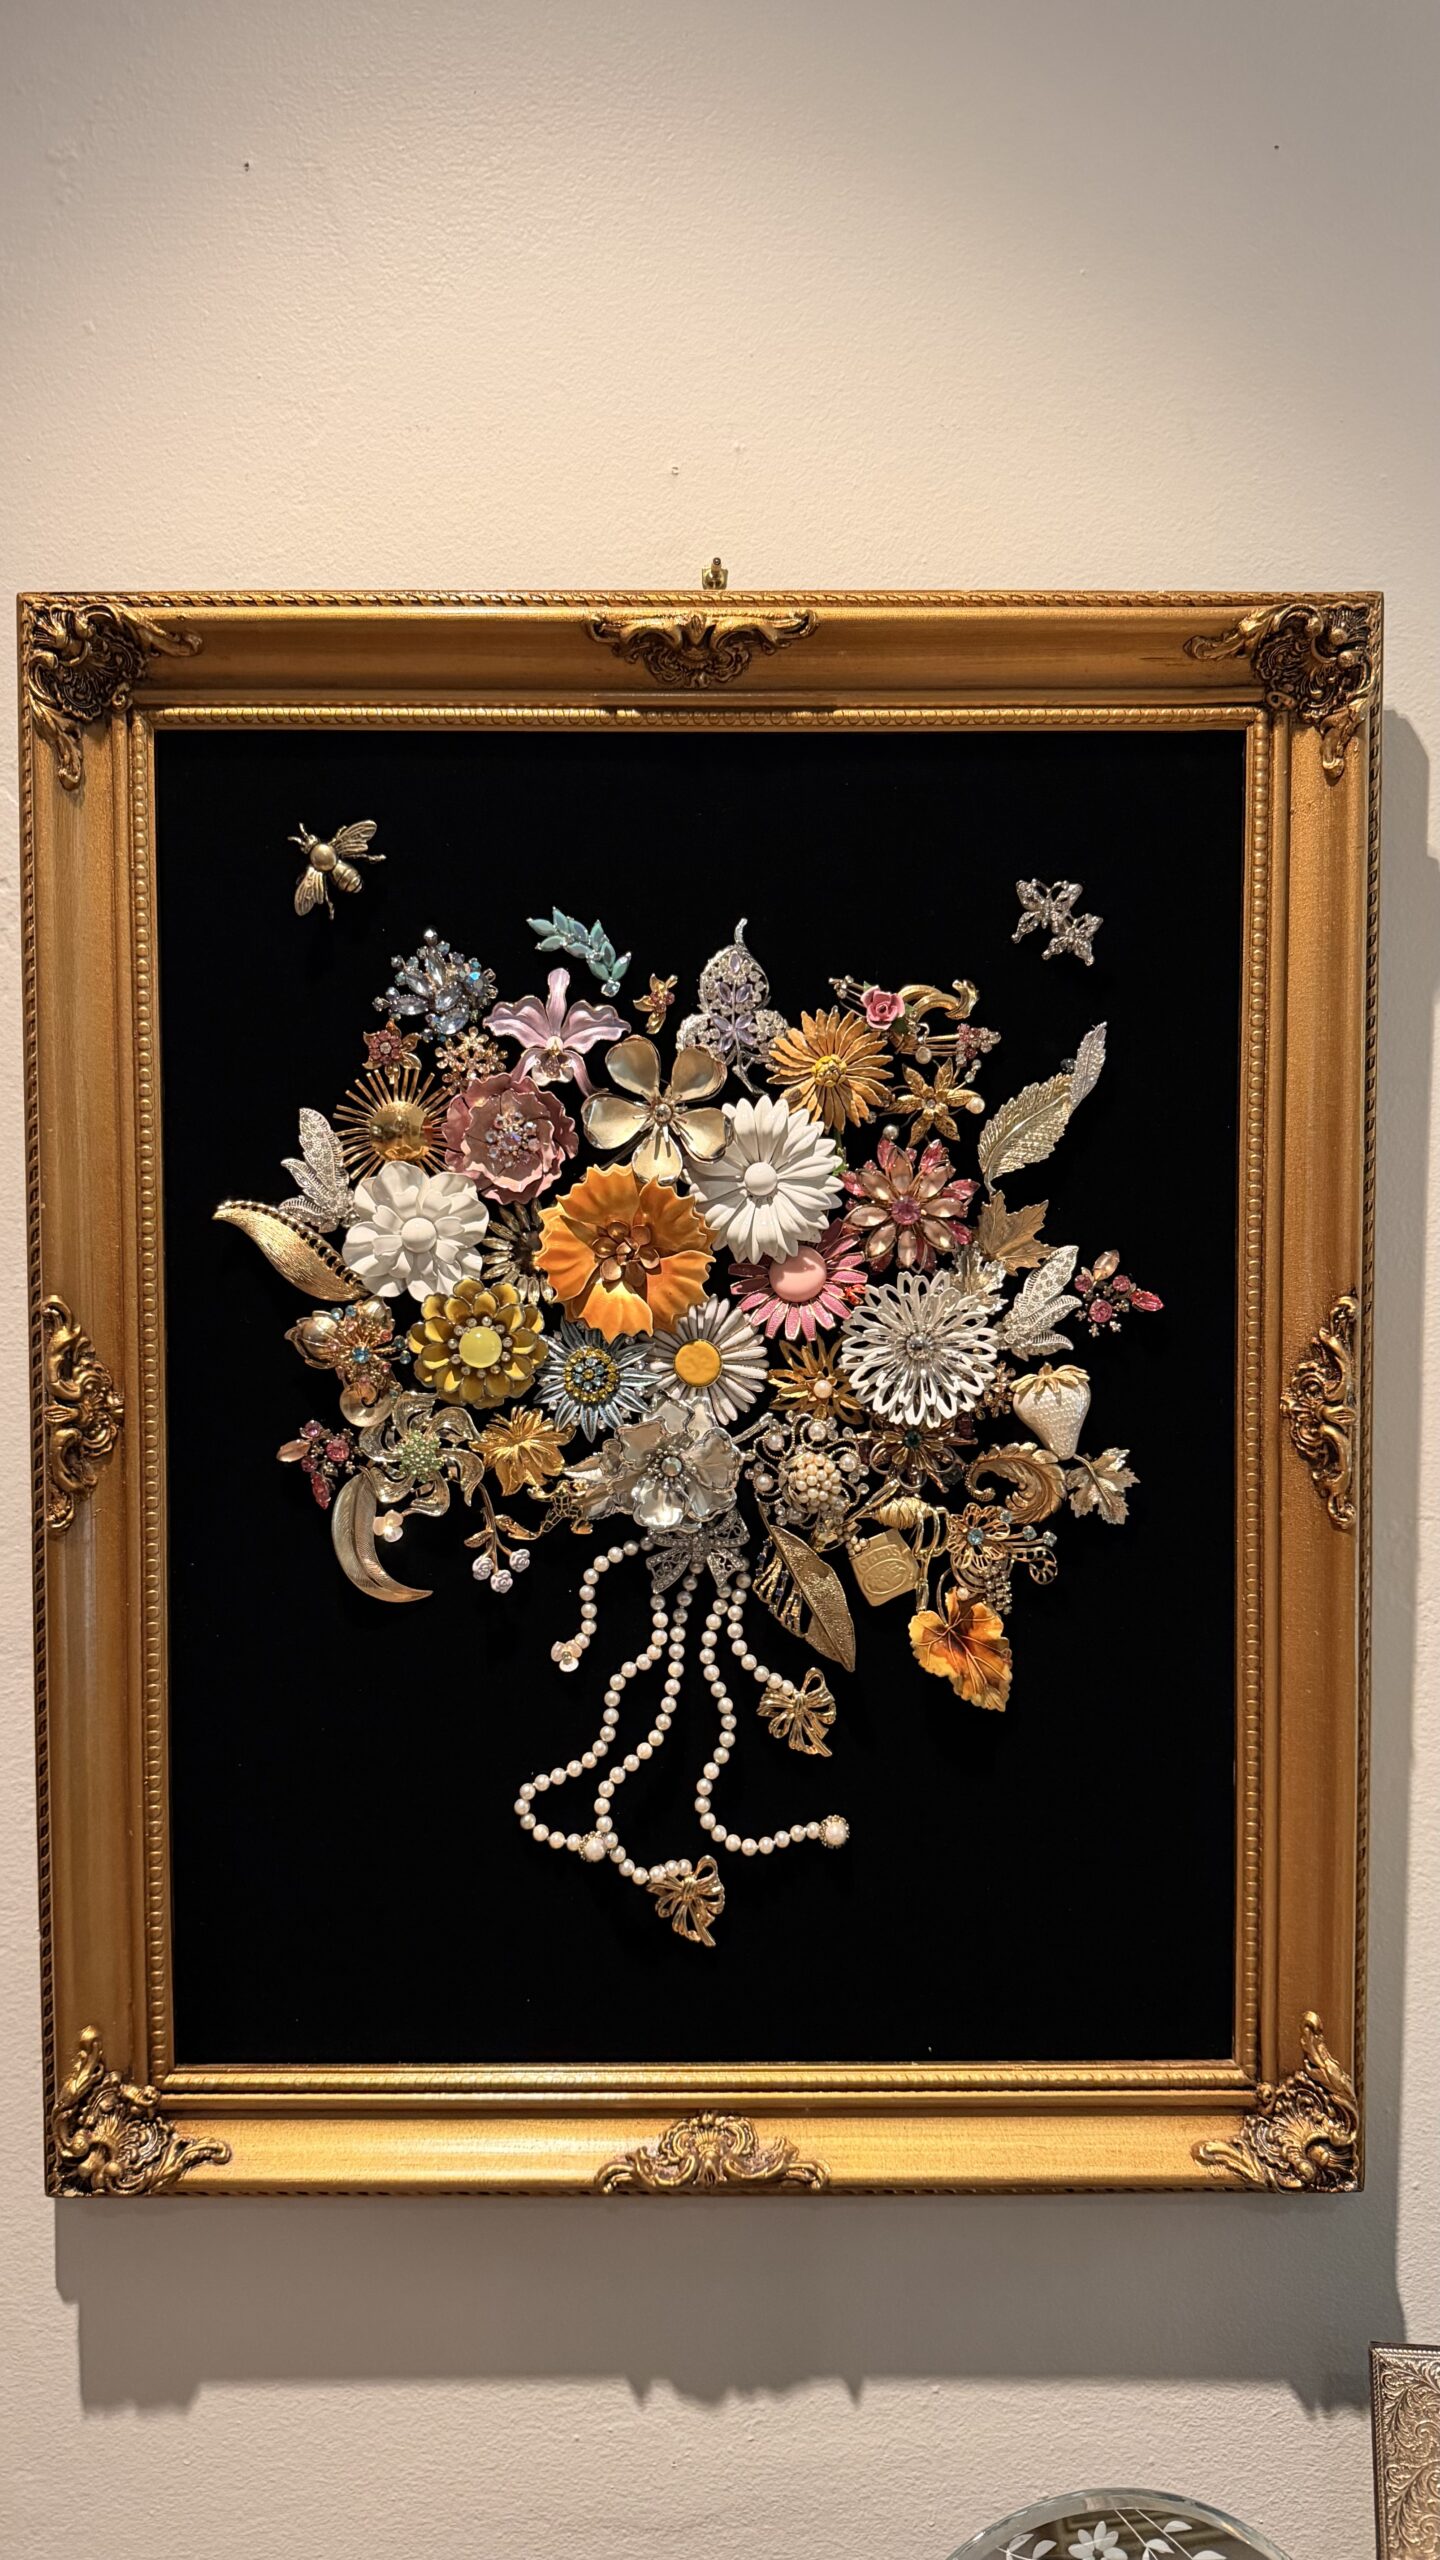
A vintage brooch bouquet blends beautifully into a home already filled with collected antiques and timeless details! It’s so chic and unique! And you can tell friends how you created it when they come over!
Places to hang it — my biggest tip is having great lighting on it! Like a jewelry store to really showcase the sparkles on the brooches!
- Above a vintage secretary desk
- On built-in bookshelves
- In a gallery wall with botanical prints
- Near a dressing table or vanity
- In a guest room
- On a picture ledge layered with antique frames
- In a hallway with other heirloom pieces
Final Thoughts + Tips
One of my favorite things about this project is that no two brooch art will ever be the same. Every brooch has its own history, and together they become a piece of art that tells a story, your story! You decide on the shape. You could even do a topiary!
- If you are totally stuck you could take a photo of all your brooches and ask Chat GPT to create some brooch art for you and see what it comes up with!
- Curate – you do not need to use every brooch you have. Carefully inspect if it works.
- Vintage bracelets and necklaces work too! You can take them apart.
- I used earring studs as well and just pushed them into the velvet!
Instead of leaving vintage jewelry tucked away in a drawer, or being overwhelmed with your inherited collection of brooches, consider making art where you can display it where it can be admired every day.
Leave a Reply