No products in the cart.

How to get started with a Home Expansion – trials and triumphs
Ready to expand your home but don’t know where to start? Here’s a guide and some tips to help you along the way – because it is an investment of your money and time.
Y
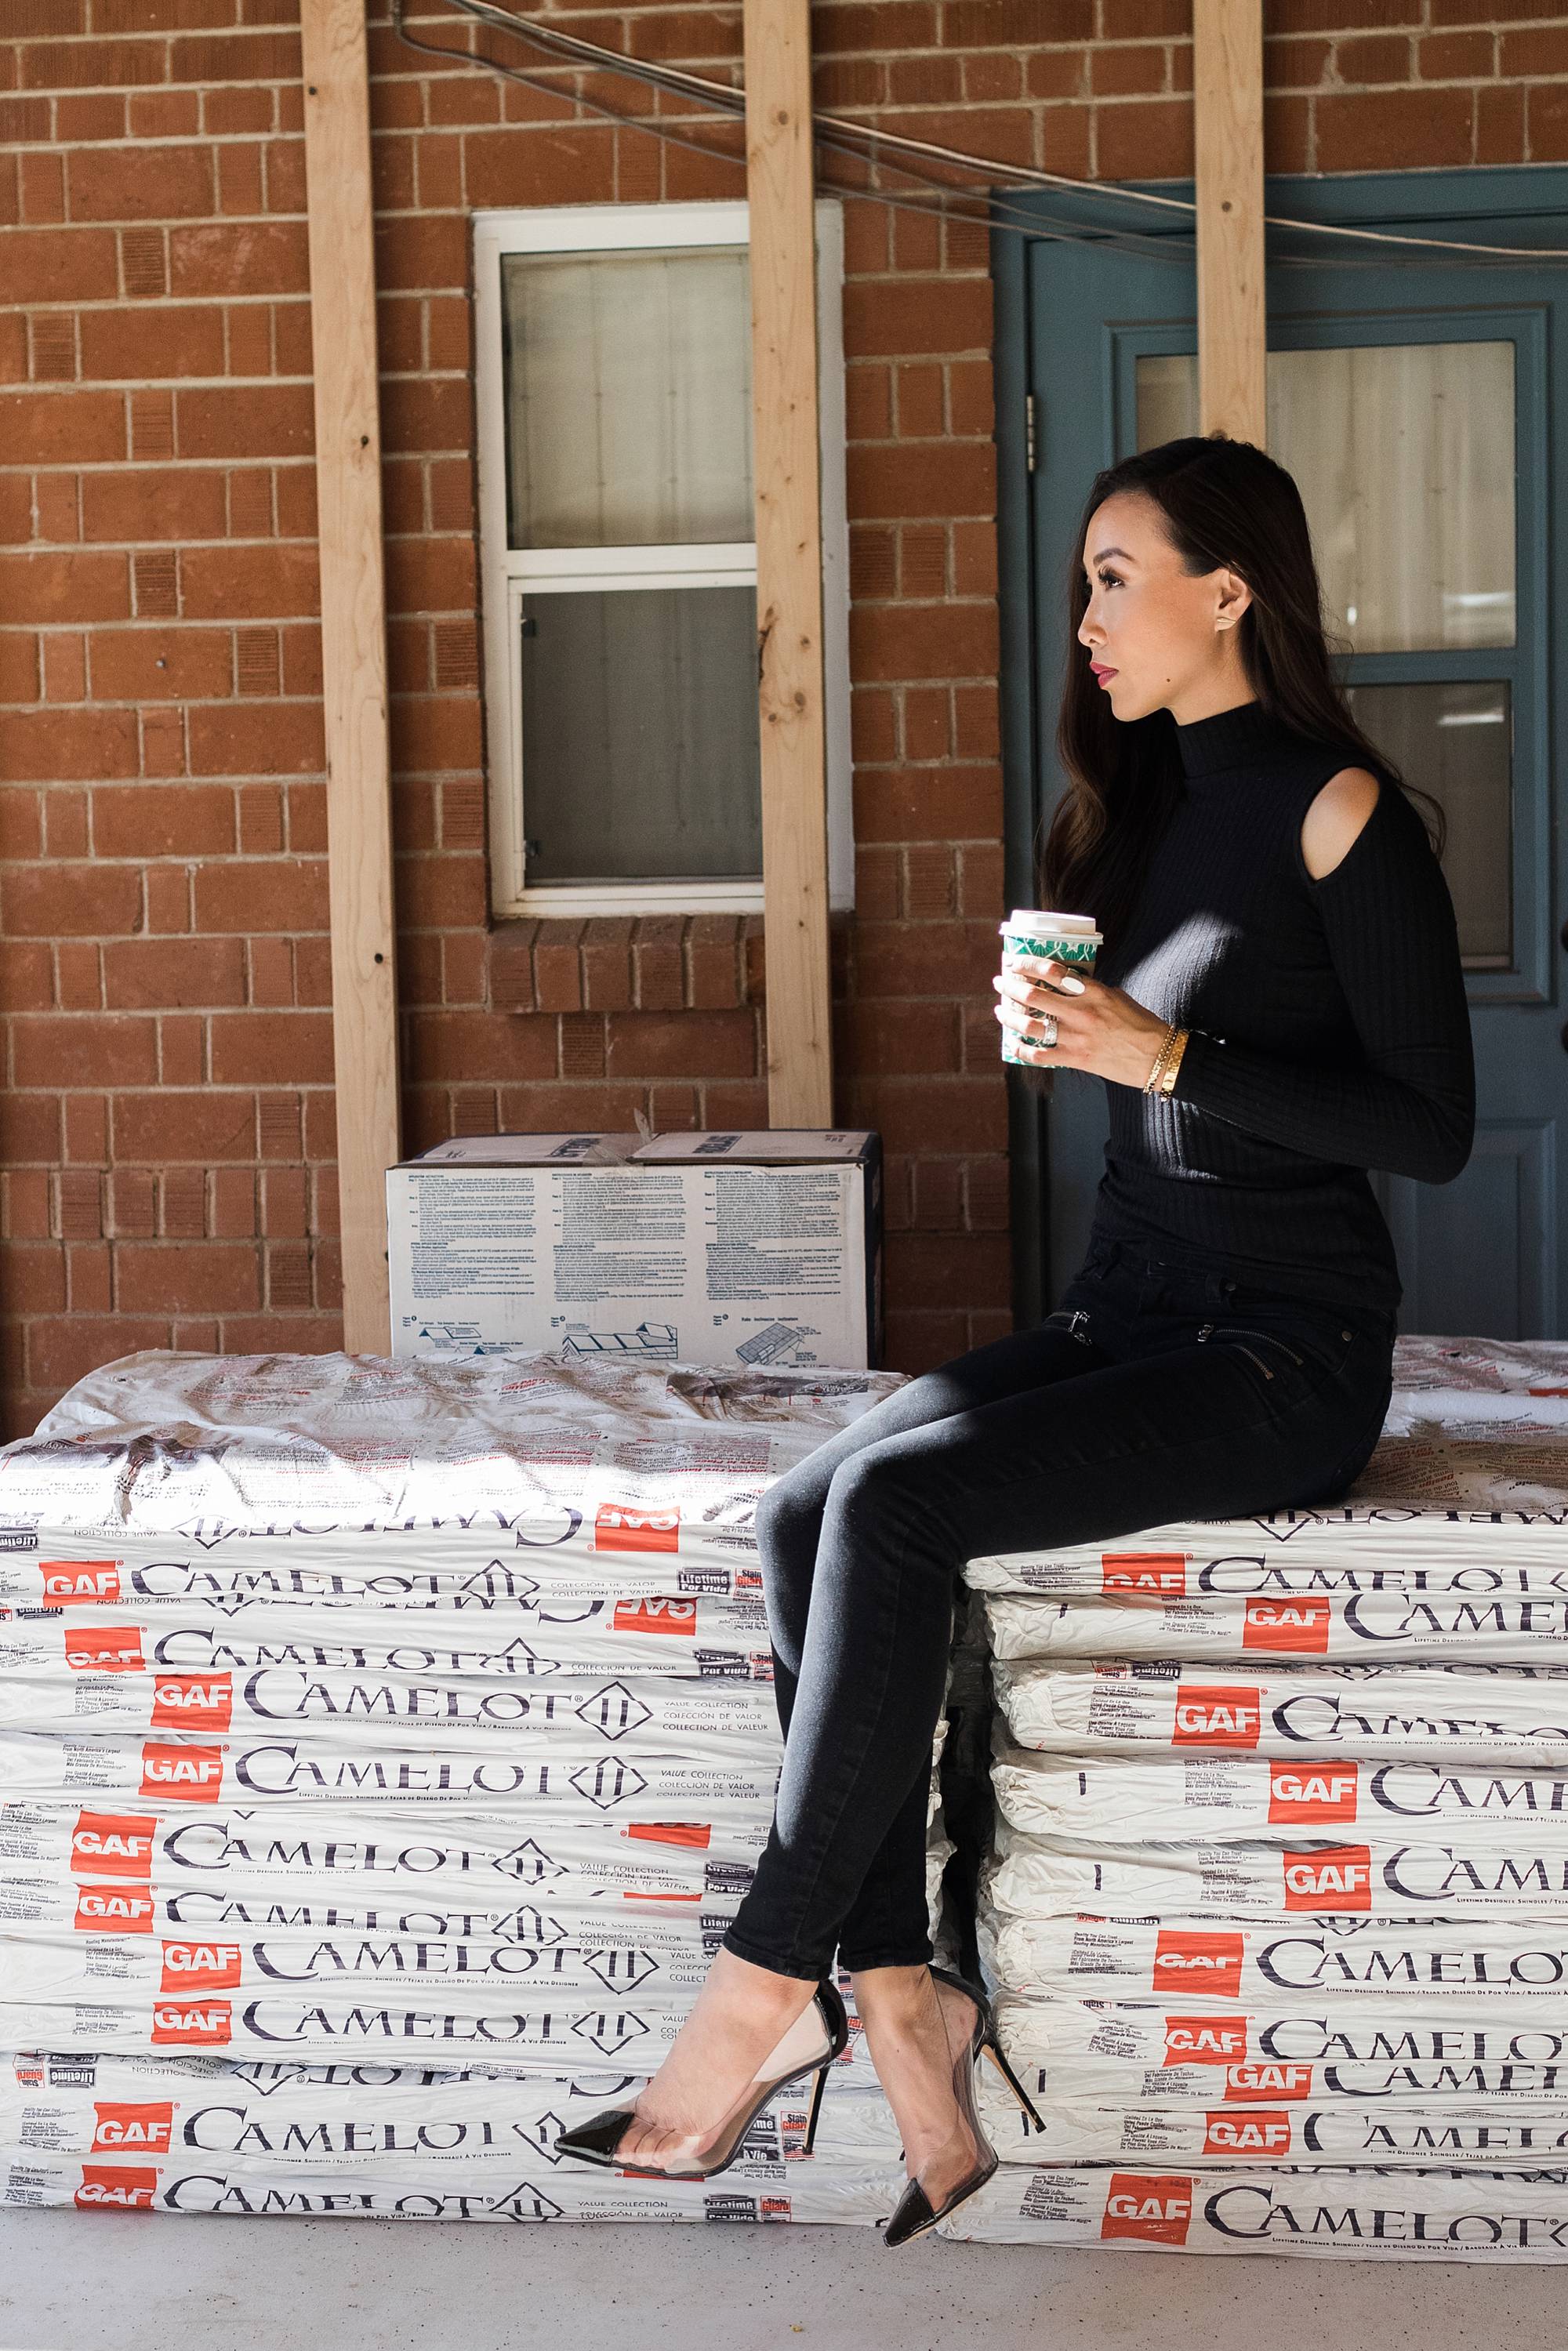
ou’ve seen many parts of our home projects through some sponsored posts, and on IG, and I thought I’d share the things you don’t see me sharing on social or just from photos – the decision making, organization, the behind the scenes “stuff” that makes it happen. I want to share what we’ve learned – you know the character building that comes from trials.
We have worked with two general contractors over the years – Trinity Homes, whose team completed our home expansion in three months even with my additional design requests and two week delay with the power company. A designer friend, Lexi Grace told us how lucky we were to be not only on time with our project, but within budget. Did you know many GC’s quotes average 20-30% over the initial quote?
Our next big project was phase two of our home expansion, the open air garage – we hired Jerrod of Hill Farm Design due to budget and the proposal and attention to detail of some overlooked things. We were also very satisfied and found the team very pleasant to work with, creative, and customer service oriented. We have hired them again for another expansion, the master closet.
But this post isn’t about who you pick to run your project. This post is about the reality of what happens when you live in construction and how to prepare yourself so you don’t panic, or make your GC, or husband crazy.
Wow! I loved the process of living in a home renovation, said no one, ever.
I hope this post will also help direct you on how to get started with a home expansion project – because we found starting to be the most challenging part.
How to get started with a home renovation expansion project
-
Save the money and know your budget or the approximate cost for what you want built
Whatever your life preferences or priorities, either save up for the project, 100% cash like we did. If you take out a loan, you’ll need to know how much your project will cost. We saved the cash for about 2.5 years in a separate account. We dedicated a specific amount and any bonuses to that account. I am only sharing this information as an encouragement that you that you can do it, if you want. But you know what is best for your situation, everyone is different. If you can save up cash it’s great when you get to the end of the project and look back without worrying about payments.
For pricing purposes, this what our GC in Phoenix told us the average costs were (this was in 2019, since prices have obviously changed and I would say it’s double at least) –
- Starting $100 a square foot for just a room expansion (no bathroom)
- Starting $125 a square foot for a room expansion with bathroom
Our project however, was about $190 a square feet. I attribute this to lots of doors and windows, as well as tile finishes, our flagstone and bathroom tile choices.
In the end on top of the initial quote we had extra costs, me adding a molding wall, painting the rest of the house, additional canned lighting and moving a trench that added an extra $10k to the project. These were due to my decisions of adding on to the project.
-
Find a space planner (optional)
Someone needs to draw up plans, lighting and help with the space. We used Celeste of Form 180. She gave a free consultation and then we paid for the project which included a specific number of revisions. If we went over, it went hourly. She was incredibly important to us to get started and I would highly recommend a space planner. Another friend I’d recommend is Kameran of K Design who I have worked with for many projects – the landscape designer for our front yard, kitchen garden, backyard and butler’s pantry.
Interior designers and I believe architects can also draw the plans up. Our plans with a space designer were over $2,000 typical for the hours spent and revisions. You will also have to pay for a draftsman (next step) and the city permits.
-
Find a draftsman
A space planner usually has a recommendation or vice versa. Celeste recommended ProCA Design. They also retrieved city permits for us (we had to pay it). According to my GC, he said the value was good for what they did – which was measuring our current space, drawing up the plans once Celeste was complete with her design, and submitting the plans to be approved downtown for us.
Sometimes a draftsman can go ahead with your design ideas, but having a space planner or professional plans you are really paying for the functionality and creativeness of that person, like a design consultant. To me that’s worth the extra instead of me trying to figure out the placement of toilets or how flow should be.
-
Get general contractor quotes
At least 4 quotes. I would say at least 5 if you have the energy to explain your vision that many times. Ask for referrals on Facebook, or ask your draftsman or space planner if they have ones. They are usually heavily networked. Ask for referrals and call them. Ask if they were on time, in budget, a good commutator, what did they mess up on, but most importantly did they fix it? Did you feel like he cared about the project? Did he have a good friendly attitude? How often did he check in with you or stop by the property? Of course if you are in Phoenix/Scottsdale area I will tell you who we used to make it easier for you!
What I learned during the home expansion
-
You have to be flexible
While it is your money and your home, you should get what you want, absolutely. However, trusses, HVAC and roof pitches might mean you can’t have a skylight “there” and it has to be somewhere else. Or you can’t get that size, etc. Some things are legitimately not possible, or will cost you a million dollars, so you have to be OK with that.
-
Go with your gut
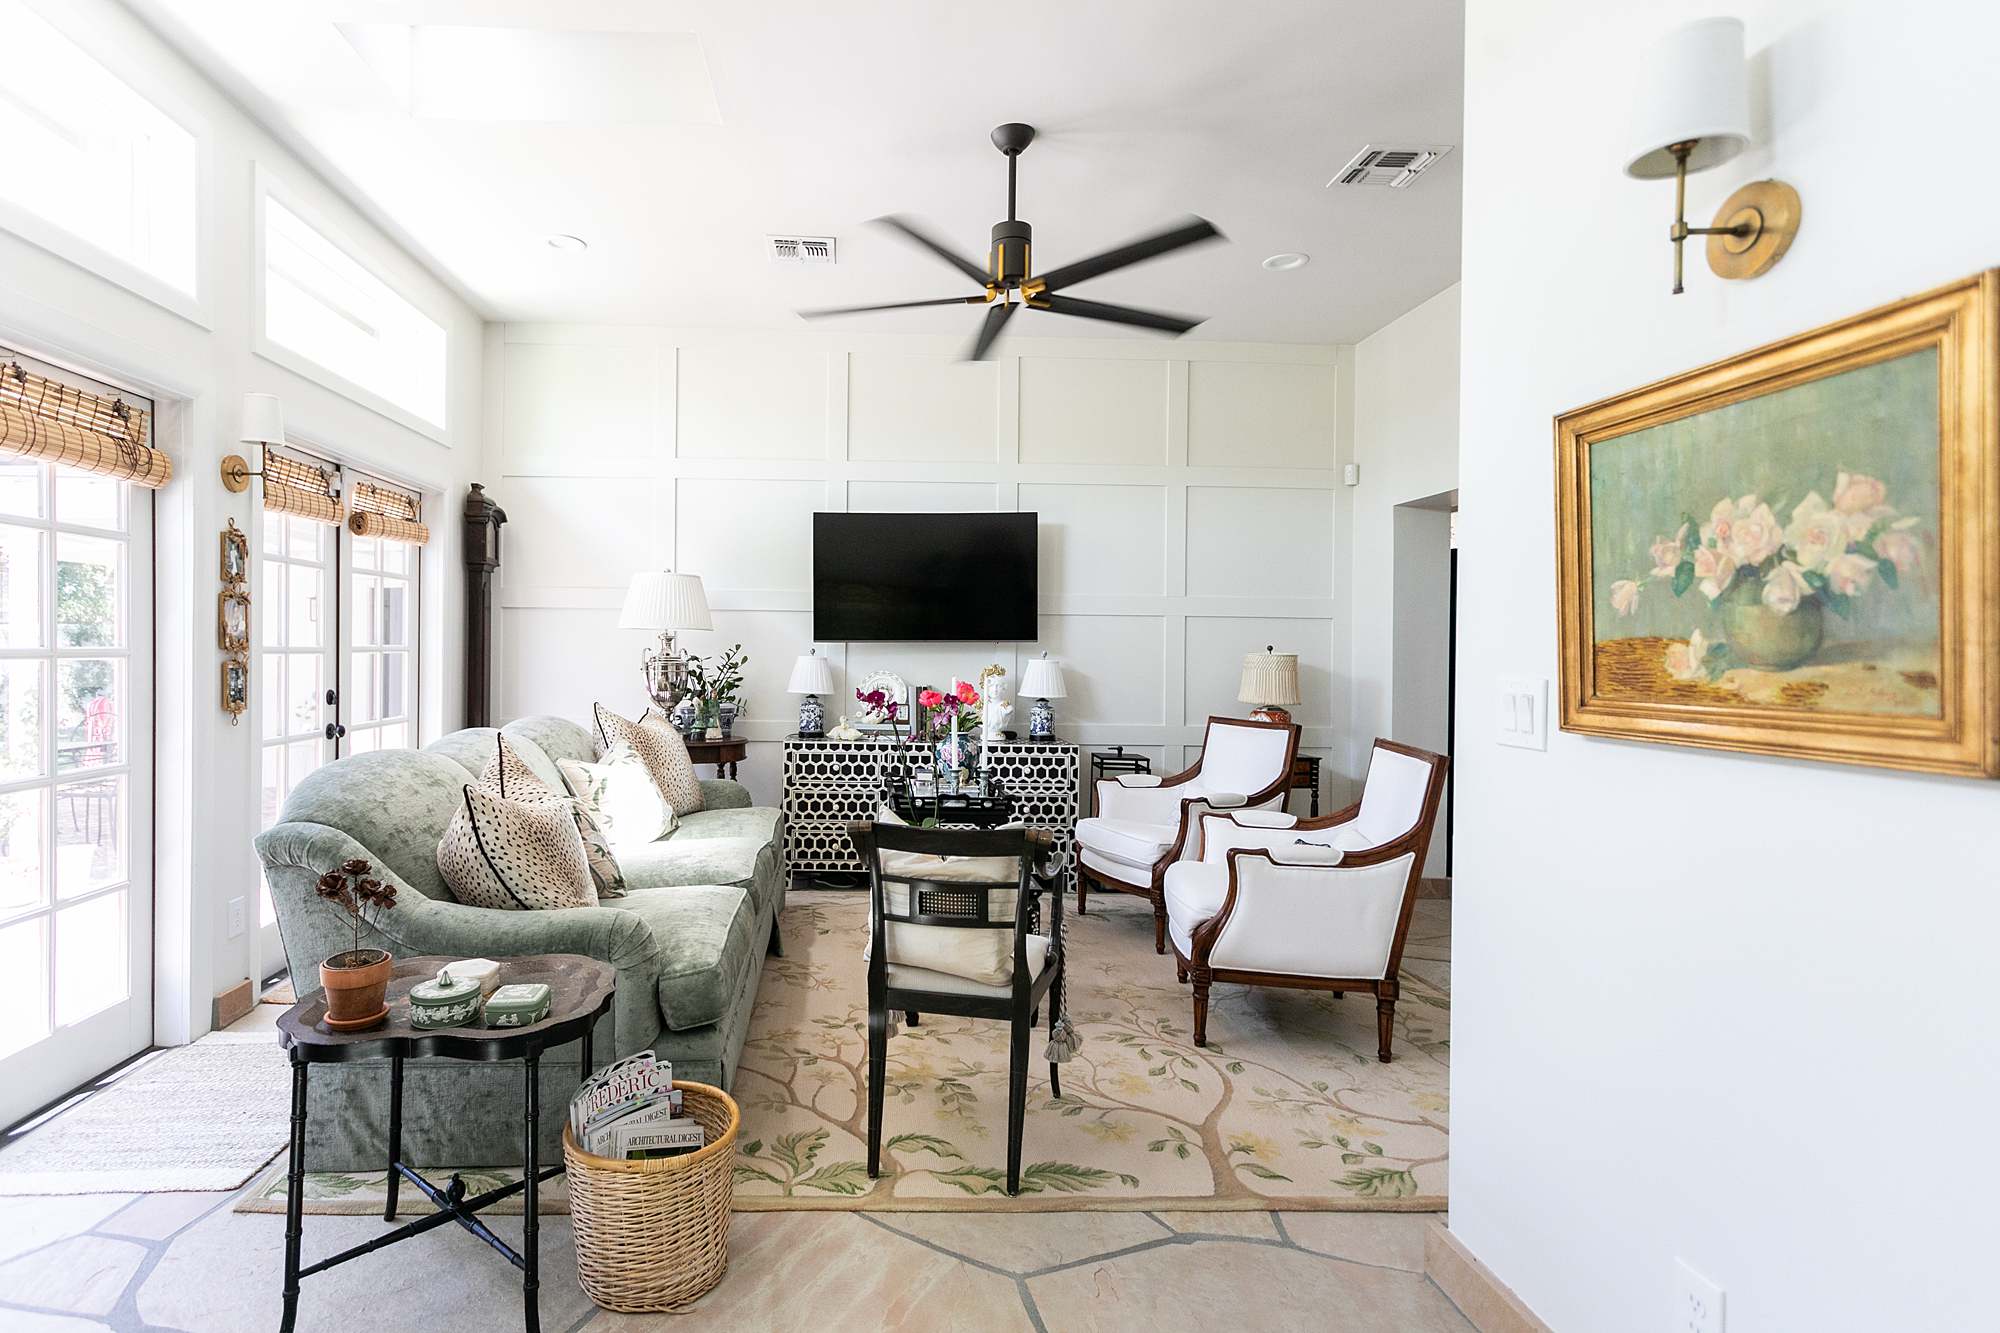
I over thought everything. Like paint color, which 500 shades of white did I want to go with, and did I actually want white? Then it was painted white and I was horrified. I had to calm down and my friends said how amazing it would look once furniture was in and I added greenery, etc.
-
Make a decision quickly
If you aren’t good at making decisions, you’re going to have a really hard time building anything or having your project stay on time. Luckily I make decisions pretty quickly when I need to and moved on. But I’ve never had to make so many as I had in three months.
-
Select the right season to go under construction to avoid moving out or being very uncomfortable
We had to have our HVAC unit off our roof for a month because the new trusses would hit that area. Not a big deal in the amazing winter in Phoenix – yes it does get cold though! However it’s better to be our Phoenix winter than a Phoenix summer which would put us at 100 at night if we had done this during the summer. Take that into consideration on when to start your project if you are living in the home. Also roofing, skylights, those things may let the outside in, like weather and bugs, so make sure outside temps are OK!
-
It will always cost more than you budgeted for
We expected this. Well, initially we didn’t. We thought we could do it for half the amount we did but we saved up a lot of money, all of it cash for a few years so we wouldn’t be stressed out. There are many things we’d like to do and add on with our home but for now, they are not must haves, and more like maybe laters for this spring.
-
Ask for opinions, then go with your gut
I have a few friends I really trust with design. It’s only because they have done the home flipping process many times or I admire their style. I ask around what people think and got some great feedback even if not asked, I took it! I was always happy to hear advice and if I didn’t like it, that’s OK! I didn’t need to take it. And deep down I was scared of a lot of things but my design friends eased my worries and applauded even if I wasn’t sure it was OK. When my girlfriend said she gasped when I showed her the room on video, I knew that I did good.
-
Calm TF down. They will fix it
Sorry for the expletive but it was necessary – at least I abbreviated it. If the project isn’t done, it’s not finished yet. So it’s ok – if there are cracks, missed paint spots, whatever the issue is, it will be fixed before you write the last check! Do not freak out, it will not be left there forever, it will be fixed! I’ve had this panic though all my projects when I hire others, some mess up but it is easily fixable and they are returning the next day so it’s OK you can explain and they will repair it.
-
You will become the mouse in the book, “If you give a mouse a cookie.”
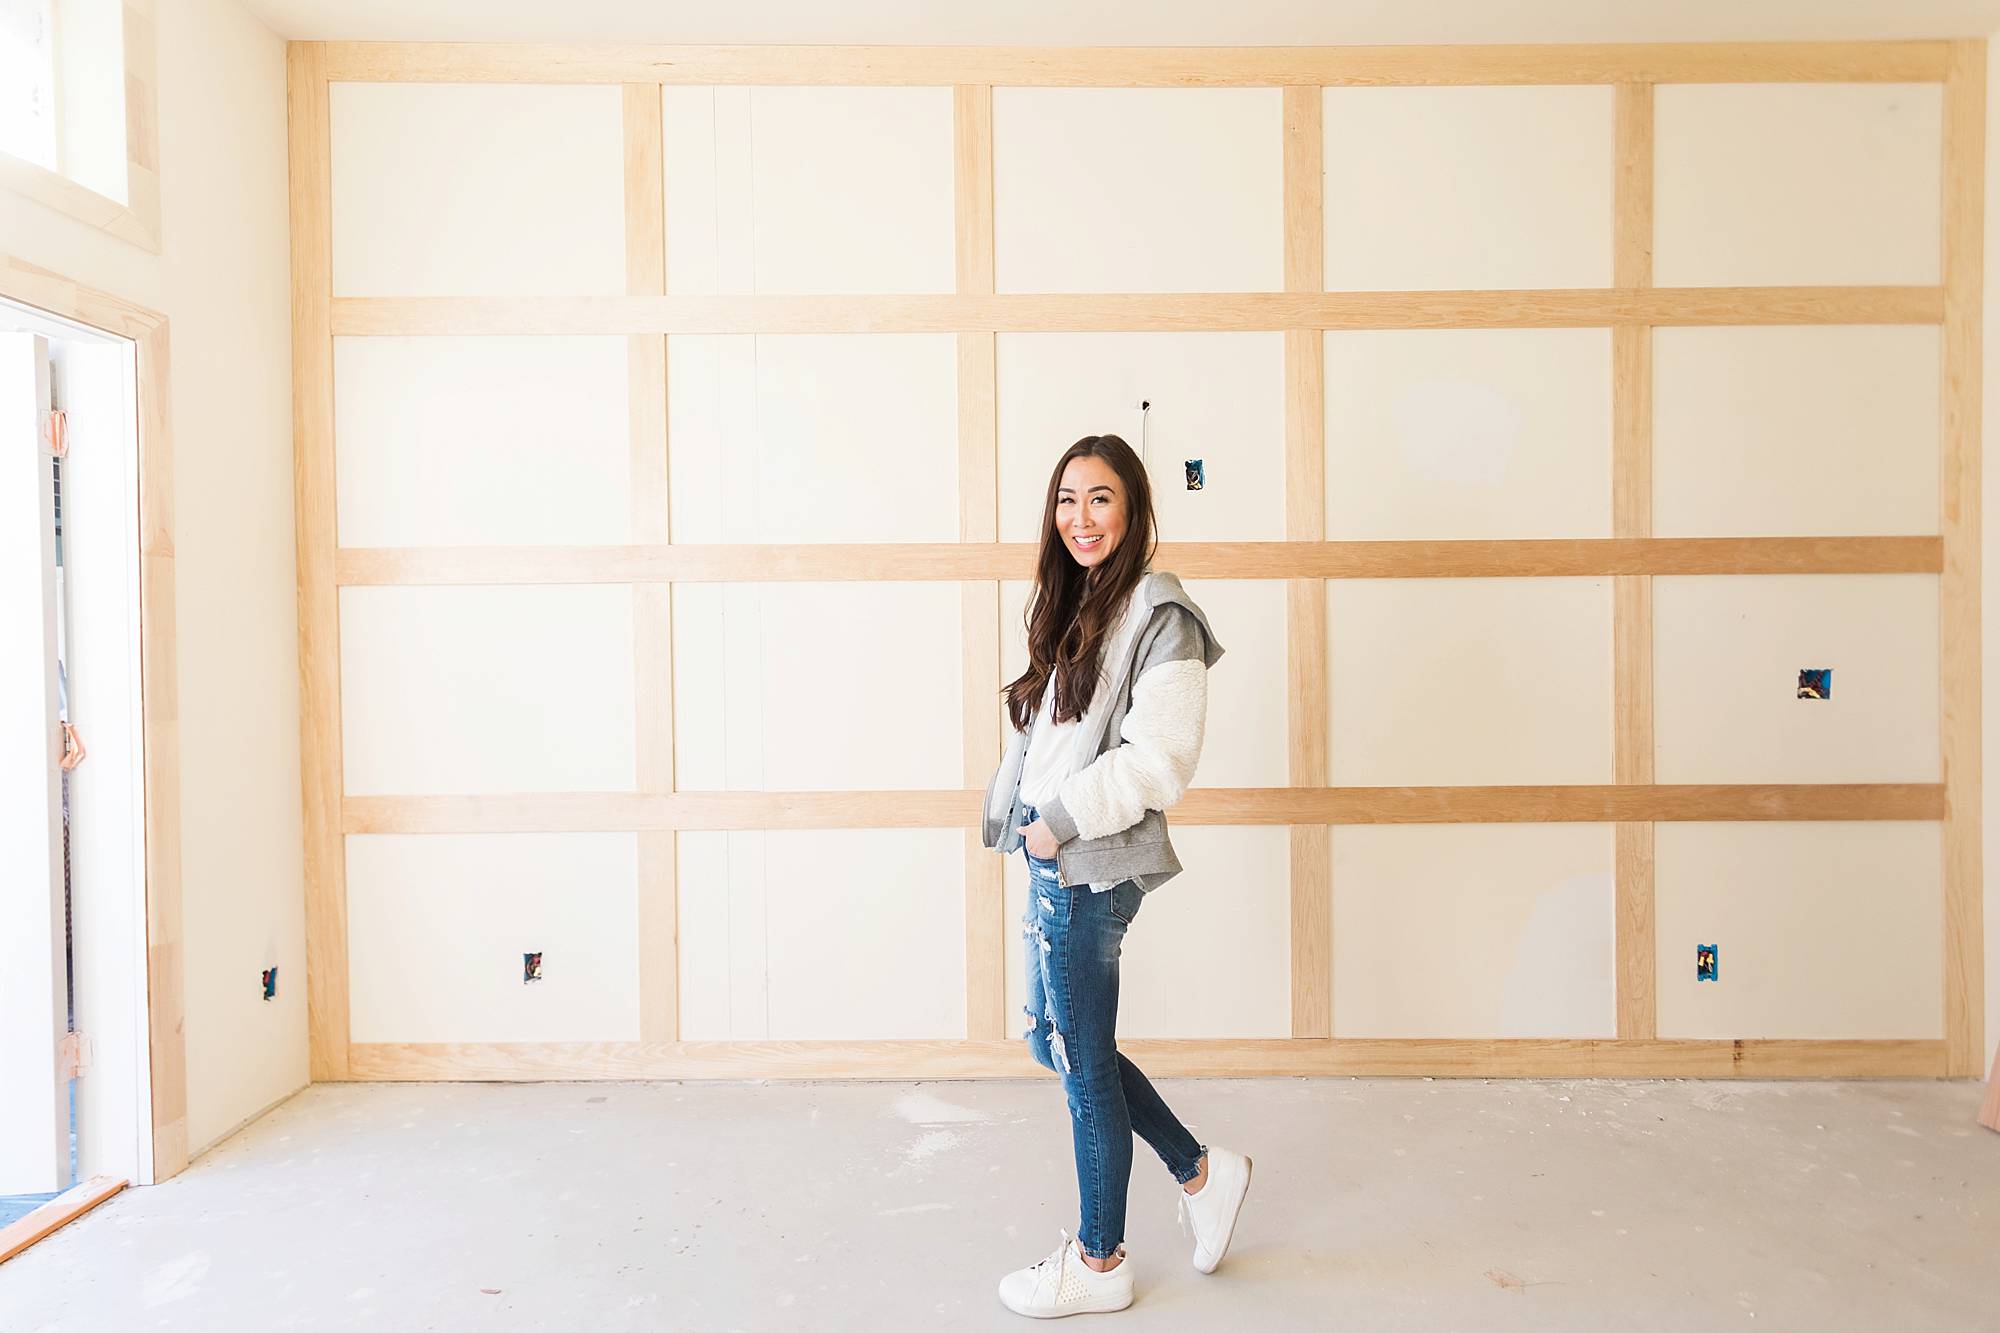
You’ll paint one thing and then decide to paint another part of your house that isn’t part of the project. Oh wait, that’s me. You’ll improve one area of your home because it’s newer, which will make you want to upgrade the rest. You’ll have to either be aware you need some cushion for this desire, or you have to make yourself stop somewhere. I chose molding to match the rest of our house, baseboards too. I don’t want to deal with unnecessary upgrades for the sake of upgrading. But when we painted our room white, we needed to patch cracks in our ceiling and also paint the rest of our house a new color anyway (matching was impossible) and white seemed the route to go. So, that was an extra amount. Just know when to draw the line and say you’ll tackle the next upgrade at a later time – and sometimes, now is a better time than any to just DO IT – but I will say do it if you can afford it (cash in the bank).

This is not the color of the expansion but the drywall primer
The hard stuff about home expansion/construction
-
Getting started was frustrating
I didn’t know HOW or WHO to call. I asked so many people, Facebook, friends the Internet! It took so much patience and I’m glad we waited for the right people to come and bid on the project.
-
Not knowing how much things should cost was maddening
We thought we’d gather all the trades people ourselves and manage the project on our own. But how is one to know what framing or siding SHOULD cost? I was worried that I would write these checks and then it wouldn’t go well and I’d be out of money with no roof. We got a quote for a service, and GCs prefer to use their own team – who are on call, who answer to them and must show up and do a good job or won’t get hired for the next project with them. When we got the entire project quote, we found that service cost HALF the price. Thank goodness! This is why I recommend a general contractor!
-
Finding a Phoenix/Scottsdale General Contractor was also beyond frustrating and seemed like an endless search
We almost quit and said we spent $7k on plans and that we’re over it. Seriously, this project almost didn’t happen. We wanted several different people to work on our project, we truly did because they were friends and we really liked them! The quotes varied and we had a total of four quotes. One guy I didn’t like his company name (really) because when he handed over his card it was called “We fix ugly homes” and I was like wait, our home is NOT ugly, I don’t want that! LOL he never gave us a quote anyway so that was odd. There is so much communication that needs to happen with you and your GC so make sure you find one that’s capable, has experience, patience, a problem solver, and kind! I was also frustrated with the meetings we had to take explaining things over and over again and some GCs said they didn’t like parts of our spaces or roof pitch, etc.
-
Be prepared to live in a construction zone
Luckily for us, it was just 3 months with our expansion great garden room, but it was difficult since we both work from home. I also use our home as a location to shoot in for work.
-
You start adding things. Which also adds to the cost
In the Phoenix area I want to share the cost of a home expansion, according to my Scottsdale Phoenix general contractor. Our project due to my windows, doors, and siding (very expensive), flagstone flooring and bathroom tile choices put us at around $188 a square foot. Not included was my additional list of fixing up our current home, so I just went ahead and added more to that project cost!
I was also told by a design friend in the industry that many GC’s go 30% over their initial quote. Yikes! Mainly because they didn’t budget correctly for it and were too excited to place a bid. However, ours didn’t, phew! Anything we went over was because we decided to add it in with the project.
-
Construction isn’t silent
Obviously, there is jack hammering and hammering and drilling, and workers talking and playing music. Sometimes it’s funny – or maybe I just got a little crazy and just started to laugh about it. I took calls while hammering was going on, it’s just what it is! If you have little ones who have nap time, forget it, sorry you’re going to have to deal with a cranky toddler.
-
You really need to be home, or visit the location every day
I know not everyone works from home, so that may seem ridiculous for me to tell you that you should be home, but if you can, you should. The last month I told everyone I was on house-arrest until the home wrapped up. Workers come over and you need to show them what needs to be repaired, they don’t know. You have to tell several people the same thing because they might not communicate. You are the project manager on site and you need to say it because no one is a mind reader. The sooner you can catch a mistake, the quicker they can remedy it. I know this drove some of the workers crazy or annoyed with me. It even sometimes drives my handyman mad, he jokes about it. But all I can think of is if I didn’t say anything and assumed they would finish or fix it (and they didn’t) how much more wasted time or additional cost that would be so I micromanage the heck out of what’s going on – and I’m not a micromanager in general really, but home stuff, you have to!
-
Some of my stuff got ruined
Whether it’s dust from construction (thankfully our GC sent in cleaners immediately, so great!) or painters being lazy and not taping off, lamp shades, fixtures, things can get damaged, or you need to be there to clean it off in your spare time. It’s frustrating and not every person treats your home as their home (or maybe that’s how they treat their home) and also we are human and make mistakes. Some are fixable, others are not, and the reality is, you have to let it go. In the end, I can be bummed about certain things but I could have either taken them down myself if it really mattered to me, or I can just look at the entire picture of the project and say hey, that’s the least of my worries, it’s trivial. It’s not the end of the world and no one and not everything is perfect.
-
You’re still going to have to clean up
Our yard got trenched and while the dirt was put back, we had to reseed. Parts of the lawn were patchy from walking, paint being dumped on the lawn, bare spots just had to be reseeded – this isn’t a big deal. Parts of your home might have paint on it that you didn’t want, you’ll have to get it off yourself. Don’t expect your home will be left in tip top condition because with construction, is, construction. You can always have a handyman come fix a few other things like we did!
A
laid back attitude when things go wrong, or need to be fixed are so important. Good communication and hopefully a GC that cares about his reputation and the quality of his work (which really is his crew) will make your project move along better.
The biggest thing I had to learn was to not freak out immediately. I still did at times, it’s a part of my personality I’m working on. I kept forgetting that it will take days to repair something, or get to an issue, but it will get done!
What I did learn immediately was understanding that things just couldn’t work out the way I wanted in my head – I can’t just stick a skylight there, because of the roof pitch, or I can’t have that sun tunnel in the middle because there’s HVAC duct right there. Some things you just have to say, OK, let’s try to make it work the best we can. There are always other solutions that you might like better.
Further reading – to catch up on home expansion process posts, click here. Have you ever undergone a home remodel or construction? What did you learn – share with me the highs and lows!
–
This post was originally published on Feb 19, 2019 and updated on June 7, 2022.
Diana Elizabeth has a fall addition coming up – a master closet!


larisa
when we did the first phase of our master bath remodel, our plumber turned into a nightmare. the guy who bid the job was NOT the same guy who finished it – i honestly think he may have been an alcoholic or addict bc he was so different from the way he was when we first met. on the final day, he came to put in the faucets on the shower and bath, then caulk them in. i explained that our tile guys had created a very small hole for the shower supply lines – and they were willing to come back out if it needed to be bigger. “nahhhh”.
then some sexual harassment and inappropriate jokes, and a HORRIBLE caulking job later, i paid him and got him out of there. i went to go clean up the caulk and make it look less obtrusive (glossy white caulk on an all matte gray tile surround), and i can see why the caulk is so clumpy. bc he decided to make the holes in the tile bigger himself – with a hammer – and he made them way too big (to the point that they were visible even after the faucets were installed. i was in tears and REALLY did not want this man back in my home. thankfully, i called our tile guys who came and fixed everything and made the plumber pay them for it. they told me they’d take care of it, and they did. we used them again for bathroom remodel stage 2 and kitchen remodel. you can not beat a trusted craftsperson.